
How to Bring your RAW Images to Life in Lightroom!
The quality of images you take today is far more realistic than of ones taken just a few years ago. That's how fast technology moves. There are several reasons for improved technology, including better equipment and editing software.

Quality matters, and that's why camera manufacturers continue to improve the technology of the equipment. It is evident in the camera's features as well as the quality of the photographic images themselves. It's also apparent with RAW files.
Even though RAW files are a good way to save your pictures - and technology is better than ever - RAW images aren't always as realistic-looking as they could be. If you want them to look close to the real thing (what your eyes saw), you'll need to do some editing in Lightroom of your RAW images. That's because what your camera captures isn't the same quality as what the human eye sees!

So, let's take a closer look at RAW photo editing in Lightroom.
RAW files can appear as less dimensional than what the eye sees, which is multi-dimensional. If that sounds boring, it's because it can look boring! While a RAW file can be great to work with in post-processing, before you do any edits, a RAW image can appear dull, lifeless or flat. That's where Lightroom can assist! You can use it during post-processing to bring your pictures to life.
Level of Detail
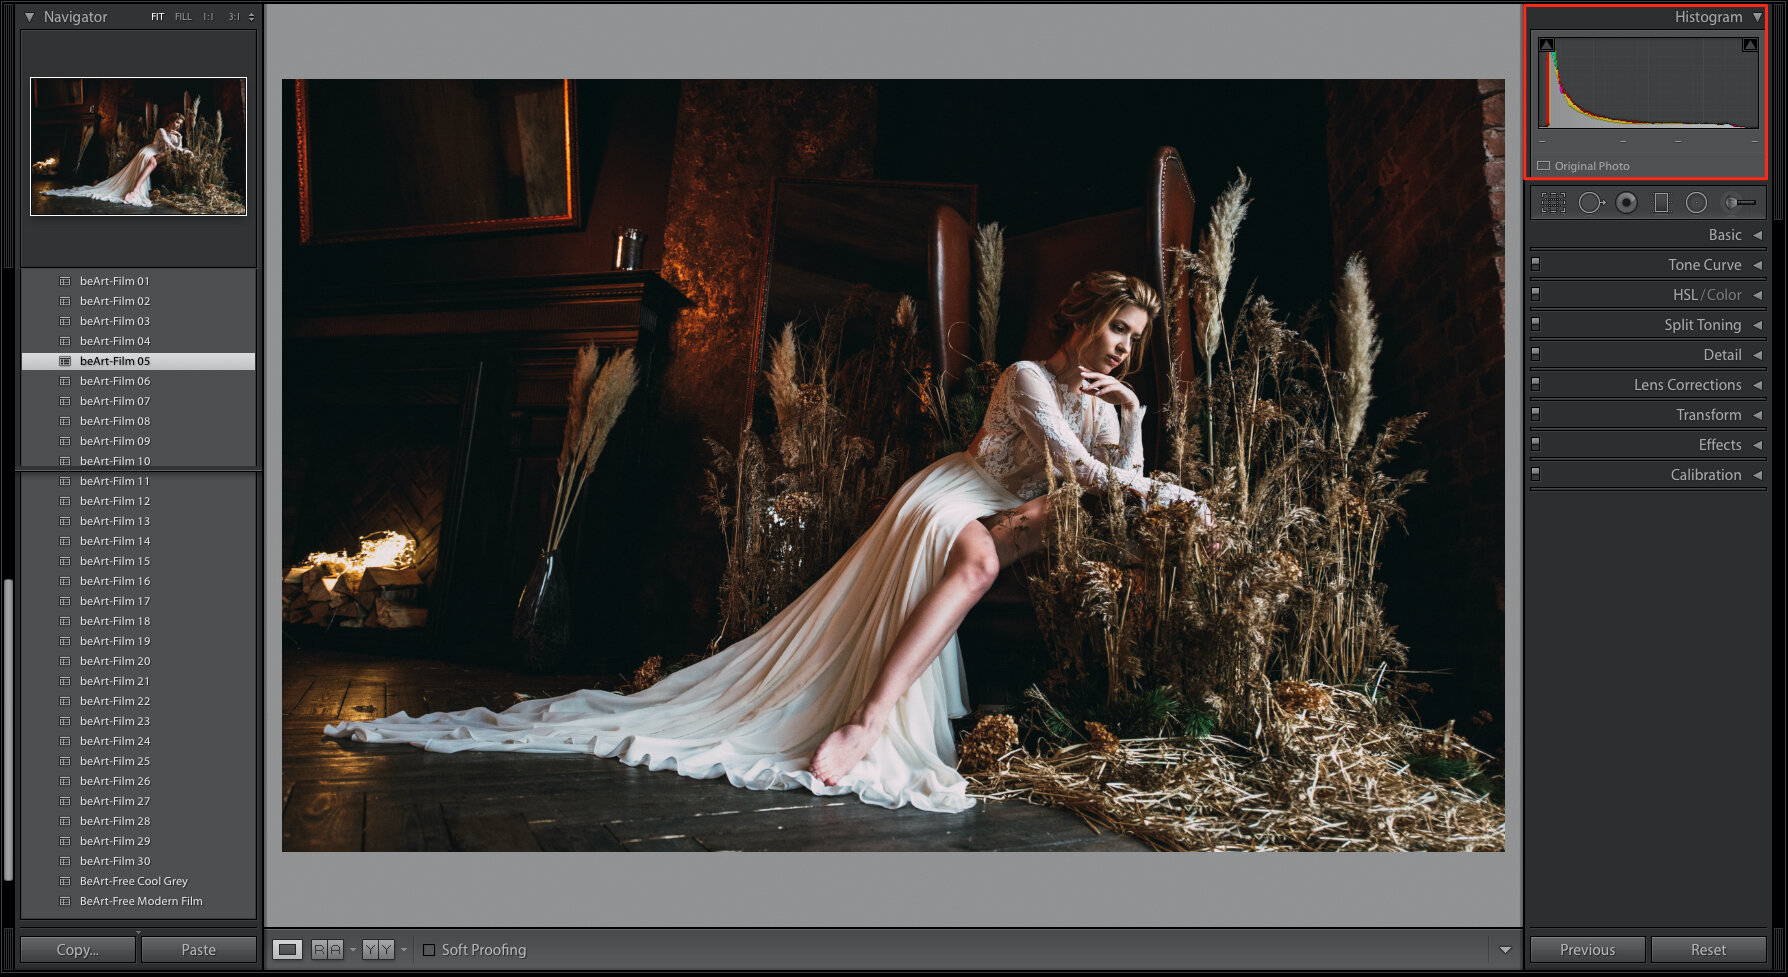
That image you see in your camera right after capturing the image (known as chimping) is rarely 100% accurate. It's critical to understand the difference between what you see and what the pictures show. While it can vary by camera, what you see on your camera contains about the same level of detail as a JPEG file. To know just how much detail there is, you need to use the histogram. But you can obtain a higher degree of detail in your image during RAW photo editing.

Factors to Consider
As experts in Lightroom presets, we know what presets can do to enhance - even transform - images and how much time they save a photographer in post-processing. It seems the options are endless when it comes to what presets can do for your pictures.
However, there will come a time when you'll want to edit your RAW files to make them appear more realistic, more like what you saw when you captured the photo. Consider these factors below before you begin to edit your RAW images to make them appear more realistic:
Lighting
Contrast
Colors
Hue or tone: warm, cold, or neutral?
You will likely have to enhance one or more of these when you begin to edit RAW images.

Lightroom Sliders
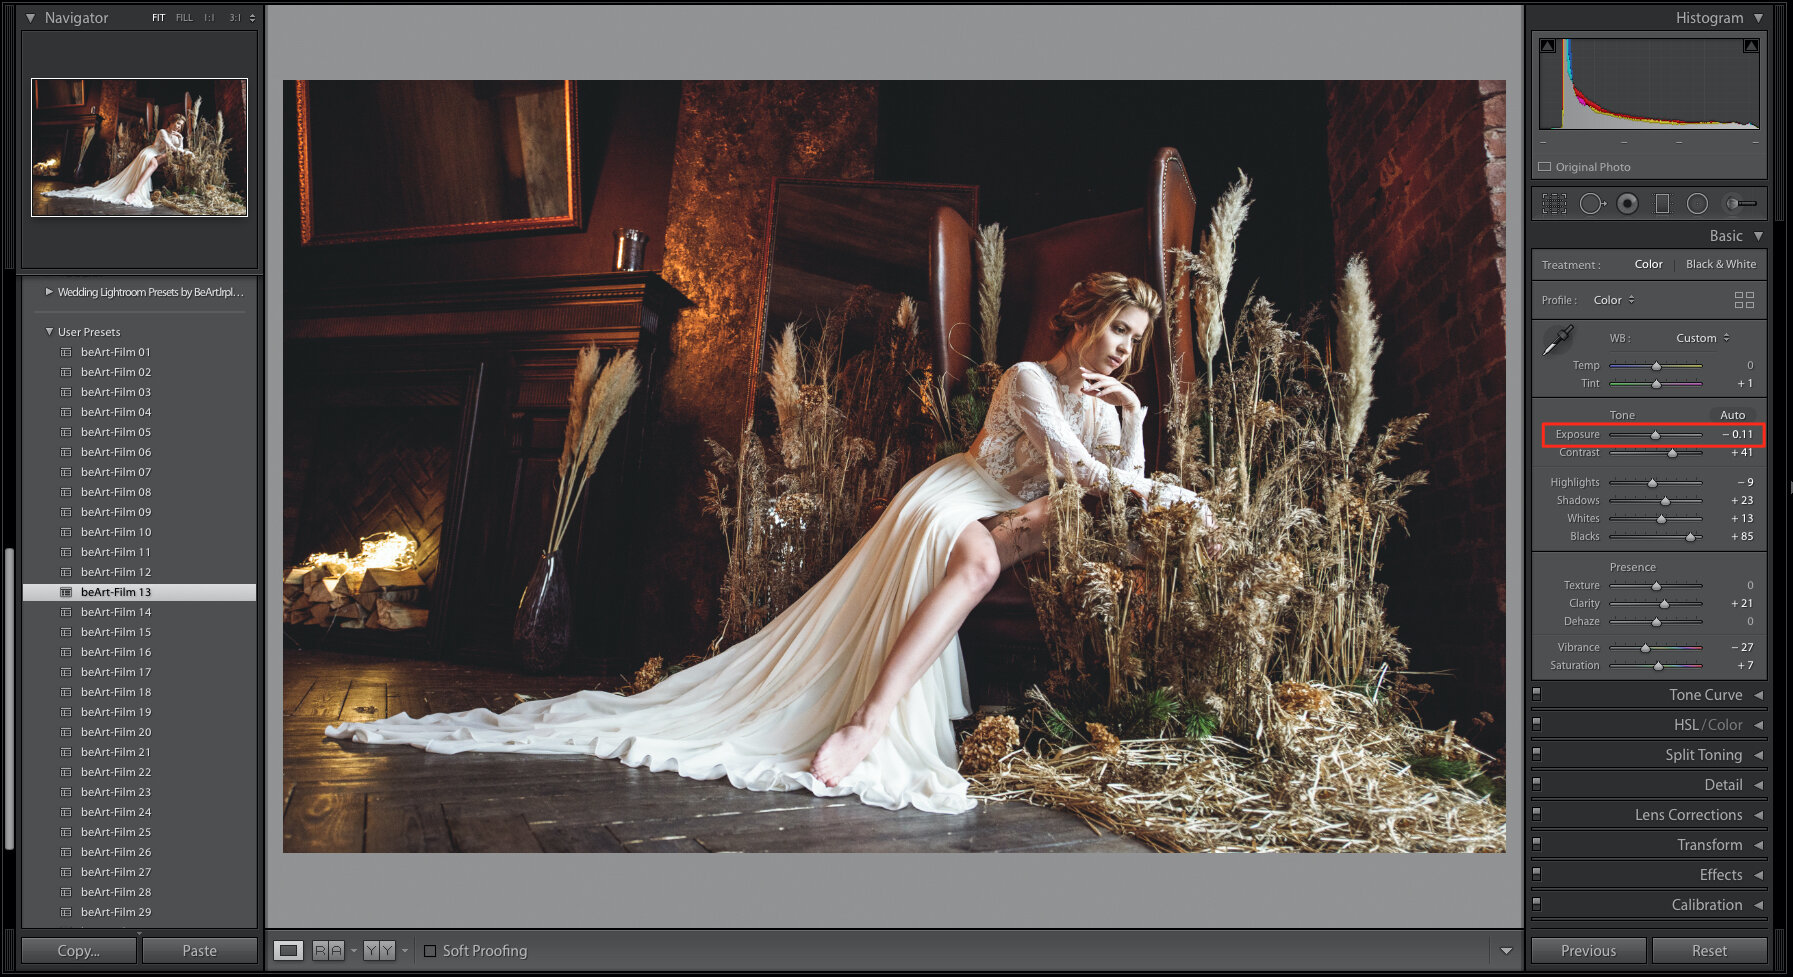
You can use Lightroom's sliders on the Develop Module to bring out details in your photos so that they look realistic. Using the sliders, you can adjust any of these to help your images look realistic:
Exposure
White Balance Temp
Shadows & highlights
Blacks
By the way, while you could use the sliders found in the Basic Panel, we think that the ones listed above will produce much better results.
Also, we don't recommend pushing the sliders to their maximum because that could ruin or deteriorate the quality of the image. It's best to try and achieve the right balance when you are taking pictures than trying to compensate dramatically by using sliders to their maximum.
Lighting
Obviously, lighting matters when it comes to photography and editing. If you don't get the exposure correct from the time you shoot, you'll have to find a way to compensate for the incorrect exposure during post-processing edits. Keep in mind that there is only so much you can do to improve an image before you begin degrading its quality. Do your best to get the exposure correct when you're taking the photo.
So, how to do you ensure a more realistic image once you're doing post-processing edits?
Try to extricate as much of the detail as possible in the shadows while bringing up the highlights. You'll find it challenging to do this - make it appear more realistic - if your image was improperly exposed. It's essential to try and shoot using the correct exposure and to compose your images so that the contrast range captured is within the dynamic range of your camera. Compose your shot to avoid this and avoid any deep shadows or very bright lights.
If you have to choose between losing details in shadows or highlights, go with losing detail in highlights. The human eye will often not see the detail in bright light conditions but will see it in shadows. It will be easier to edit your RAW photos in Lightroom so that you can bring up the details of shadows.

Lastly
Before you take a picture, keep in mind the edits that are - and aren't - possible to make to your RAW images later in post-processing. That should help guide your decisions out in the field when shooting and composing images. If you make a habit of doing this, you'll find it easier to edit RAW photos. The better exposed a picture is when taken, the more realistic it will appear!


