
4 Easy Post-Processing Tips to Enhance Images in Photoshop
If you're new to the post-processing process, these four simple tips can help you improve your work. Editing your images is a must-do for all photographers because it can help adjust for whatever you weren't able to do (or forgot to do) out in the field.
Sometimes conditions such as lighting can lead to producing images which aren't optimal or indicative of your best efforts. That's where post-processing comes in using software like Lightroom or Photoshop. Read on!
1. Straighten the horizon
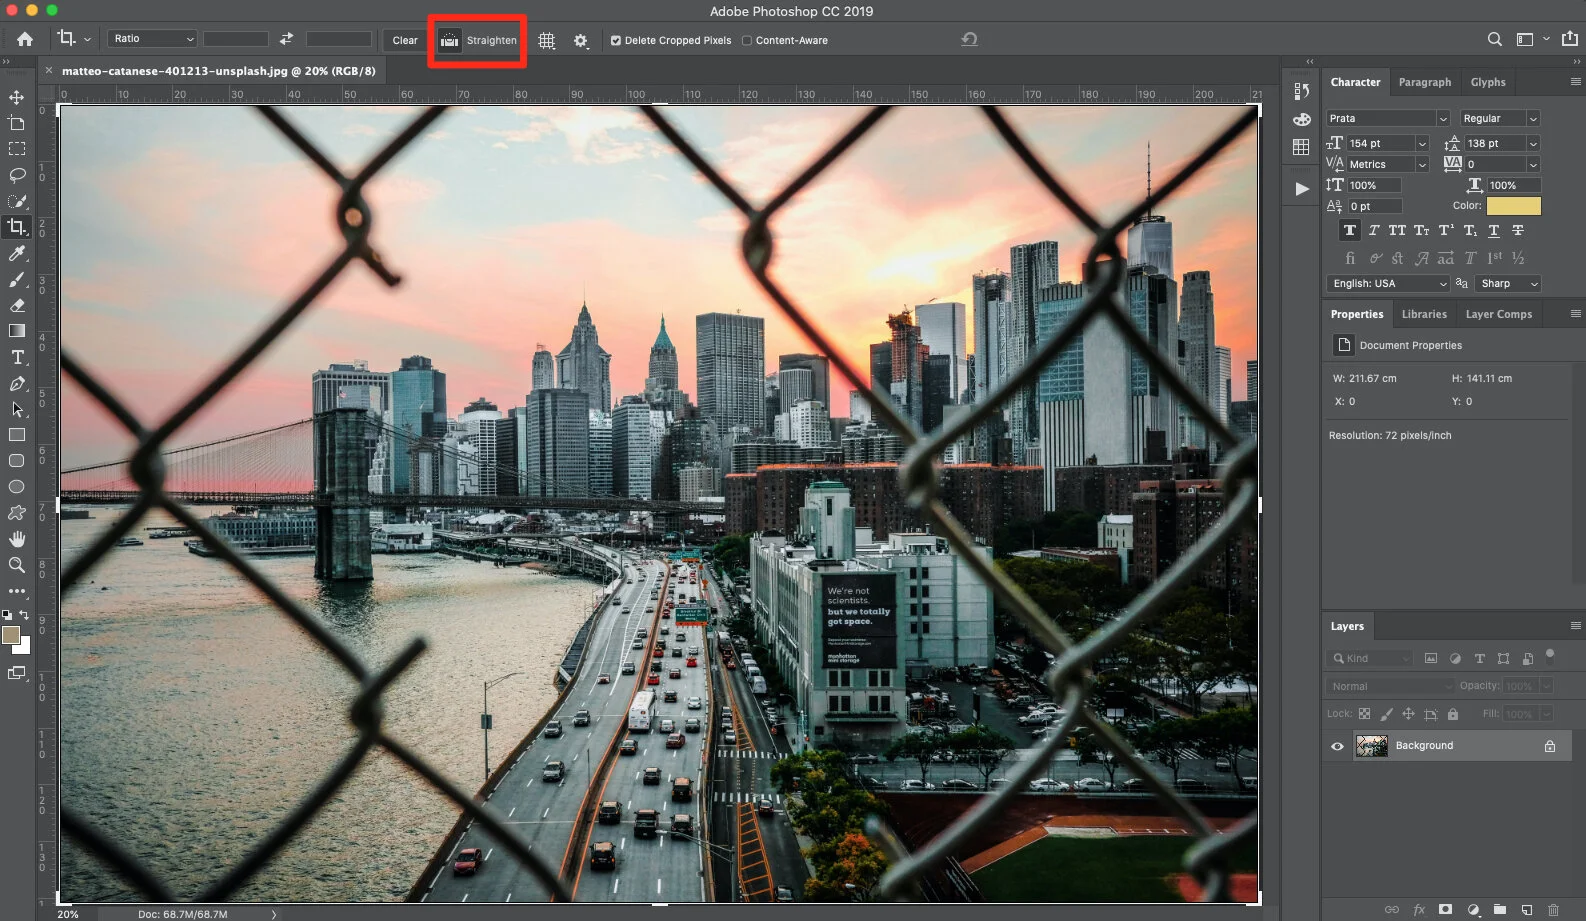
Unfortunately, it's all too easy to shoot an image and then realize later that the horizon isn't straight. Even if it's just a tiny bit off, it can throw the whole picture off.
So unless you're deliberately shooting without regard to the horizon because it's not relevant to the composition, you'll want it to appear straight. Fear not, it's easy enough to address in post-processing. Here's how to do it in Photoshop (fairly similar process in most software):
Step 1: In your toolbox, find and select the Crop tool.
Step 2: Click the Straighten option.
Step 3: Click on one side of your horizon and drag across the horizon line before you release it.
Voila! Your horizon should now be straight!
2. Increase contrast for more powerful images
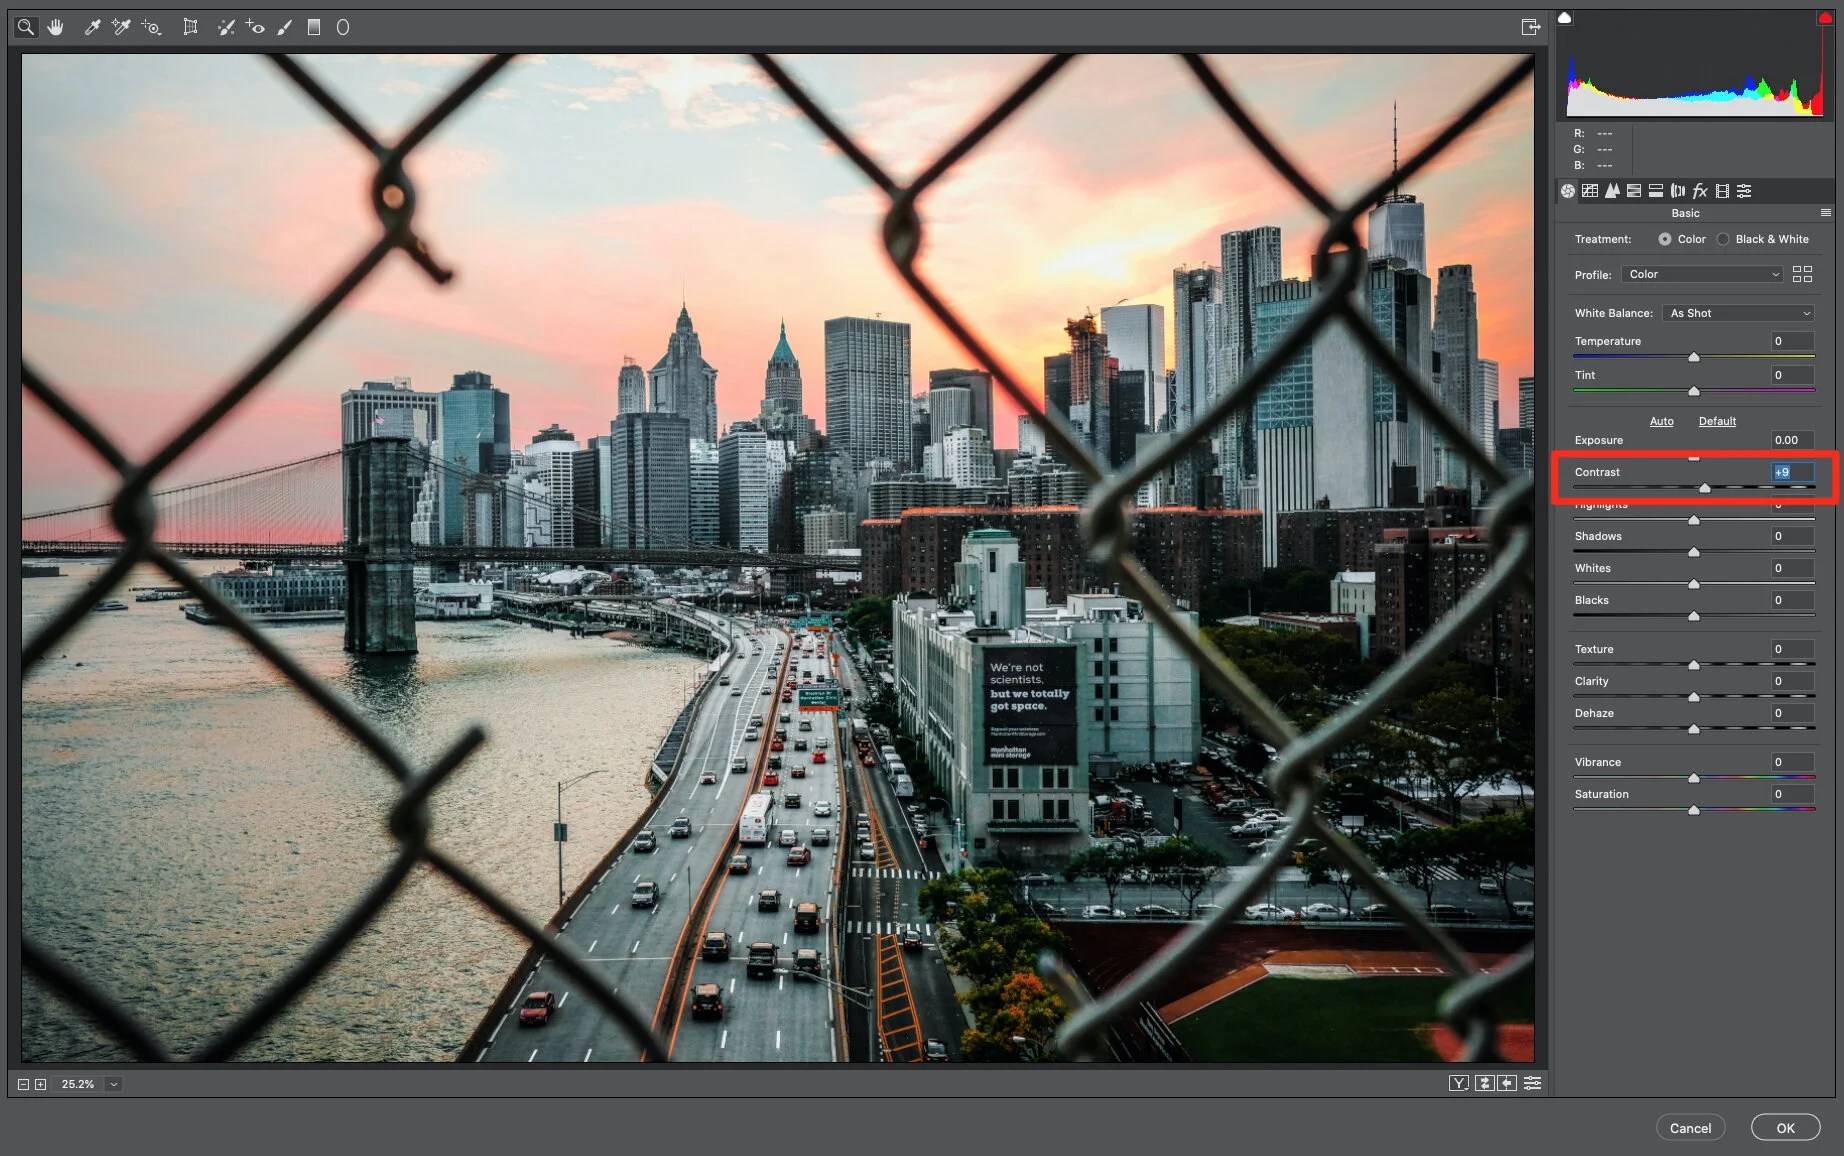
Increasing the contrast is an excellent way to add depth and interest to an image. It's an easy way to enhance your picture with minimal effort and time. Increasing contrast darkens your shadows and lightens your light areas.
How much you add is relatively subjective. Use the contrast slider in your software to adjust it. This is a bit like "salt to taste" in a recipe. Increase or decrease the contrast as much or as little as you want.
3. Sharpen for the Internet
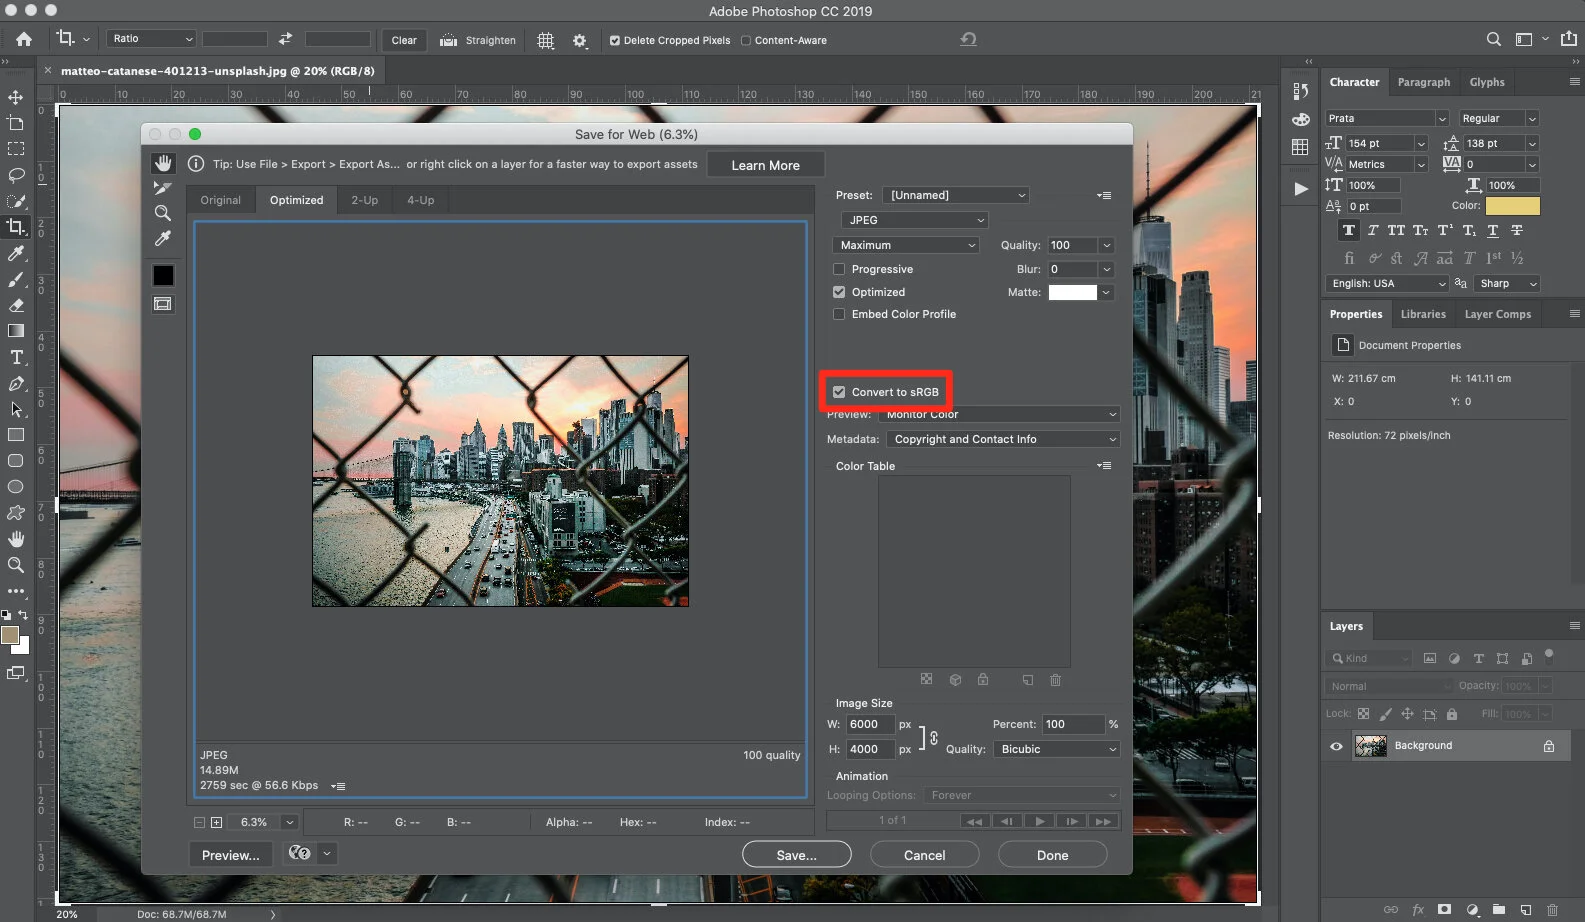
At some point, you'll want to upload an image to the Internet. To do that, you'll need to export an image from your editing software. Keep in mind that when you export an image from any editing software, you'll end up with more blur than what you saw in the image during post-processing.
You can avoid that by following several steps to ensure the image doesn't pick up more blur upon being exported. While there are several ways to do this, here's one method:
Step 1: Make sure the image is sized to what you want before you sharpen or export it. If you adjust for blur, then resize it you'll have wasted your time. Always resize first, then adjust for blur.
Step 2: Duplicate your layer.
Step 3: Desaturate your new layer from Menu, Image > Adjustments > Desaturate.
Step 4: Change your blend mode to Overlay.
Step 5: Apply a High-Pass filter from Menu, Filter > Other > High Pass. Choose a radius of around 2.0 for an image of 730 pixels on the long side. The Overlay option you select shows you how the radius affects the image. The bigger your picture, the larger your radius will be.
Step 6: Save for the web from Menu, File > Save for Web. Check the Convert to sRGB box if unchecked.
4. Enhance colors
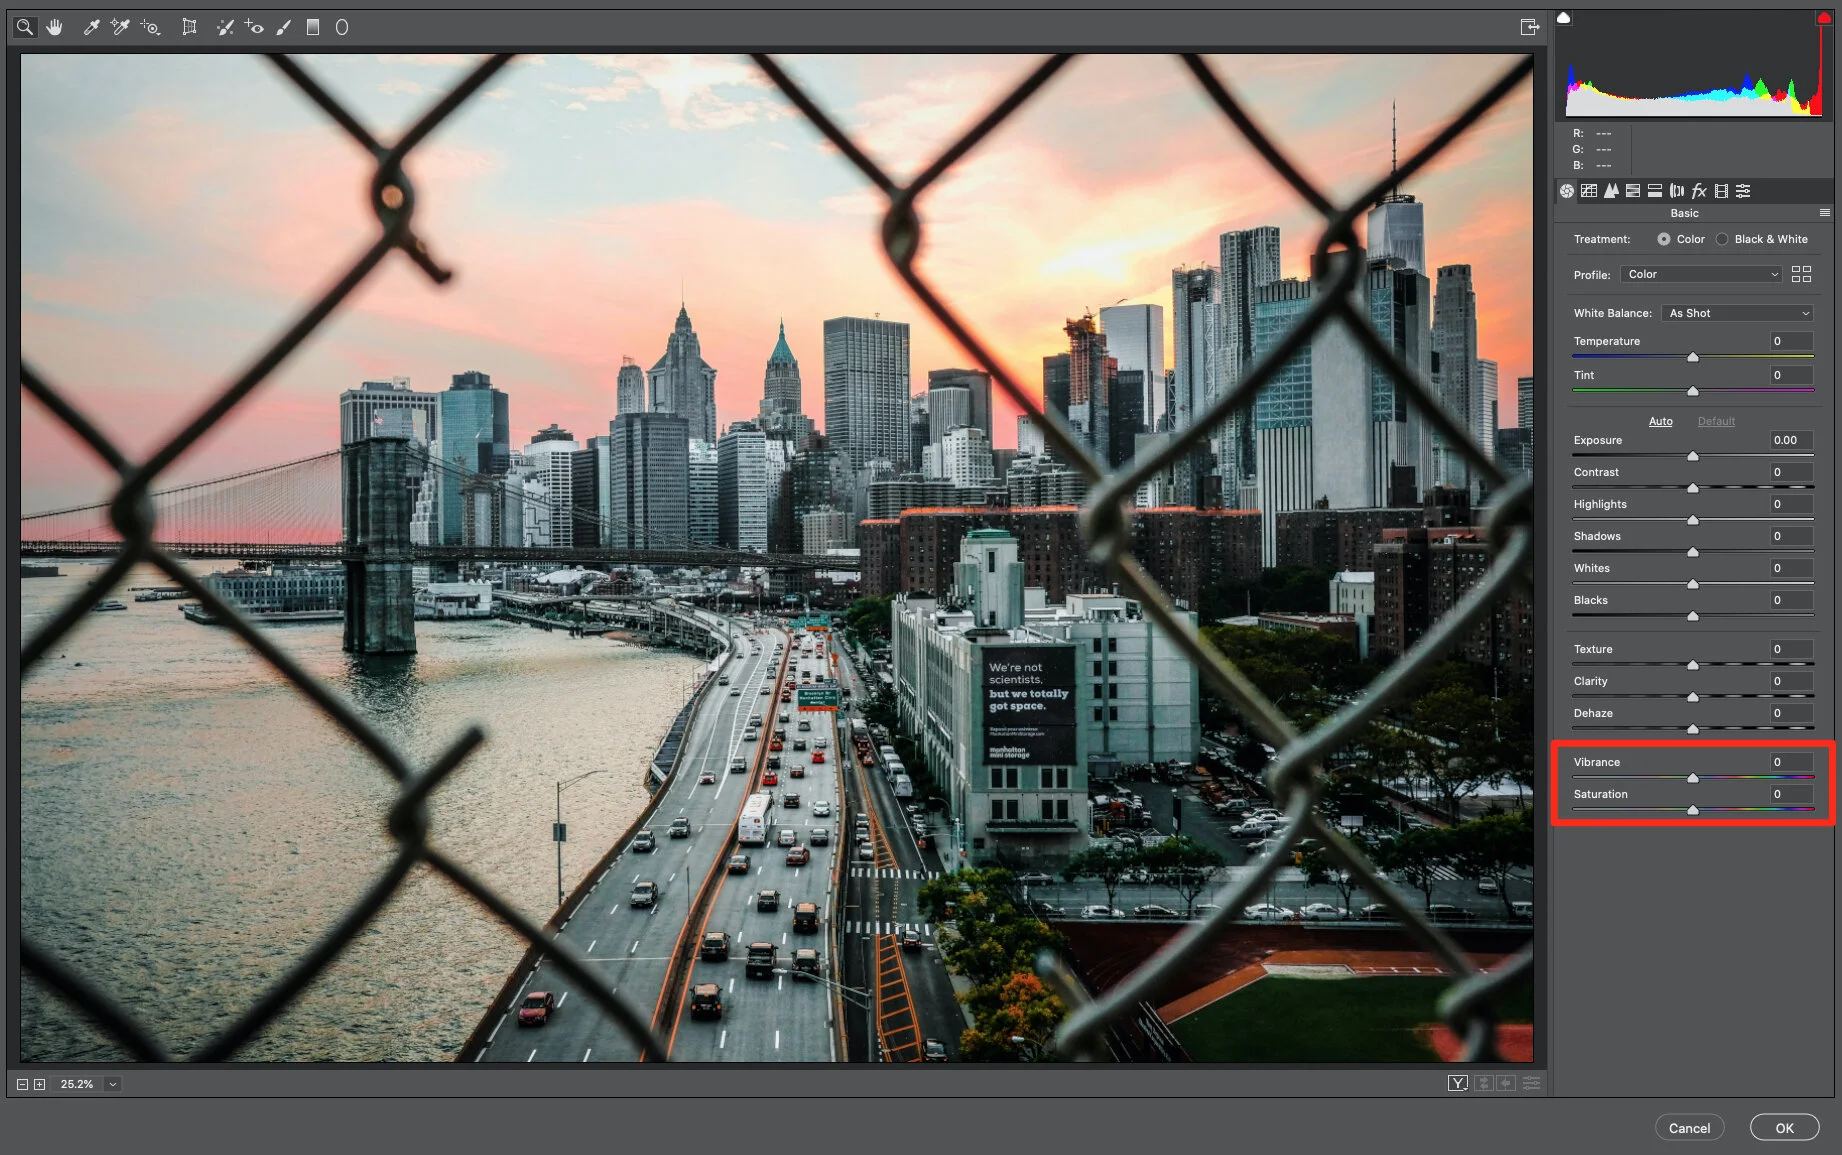
If you want to perk up the color in a picture, turn to the Saturation and Vibrance sliders. While they both can boost colors, they're not quite the same. Saturation relates to the intensity of all the colors found in an image. Because it adjusts all colors, you'll want to be careful using this one. It's possible to overdo it.
Vibrance will only boost the saturation of the less-saturated colors in an image. You'll probably use the Vibrance tool more often than the Saturation one.


