Straightening an Uneven Photo in Lightroom
How often have you taken a picture only to realize in post-production it's not straight? In other words, everything is angling to one side or the other rather than straight across the horizon. It's frustrating, especially when everything else looks awesome. Here are two of our favorite ways to correct the issue using Lightroom.

CORRECTING AN UNEVEN HORIZON:
That slanted horizon is forever and always a huge disappointment and, not an infrequent, occurrence even for professionals. Luckily, it's a correctable problem! One of the most critical aspects of a picture is the horizon. It's a significant point of reference whether in print or real life. Here's what to do when things are looking a little uneven:
Auto Mode:
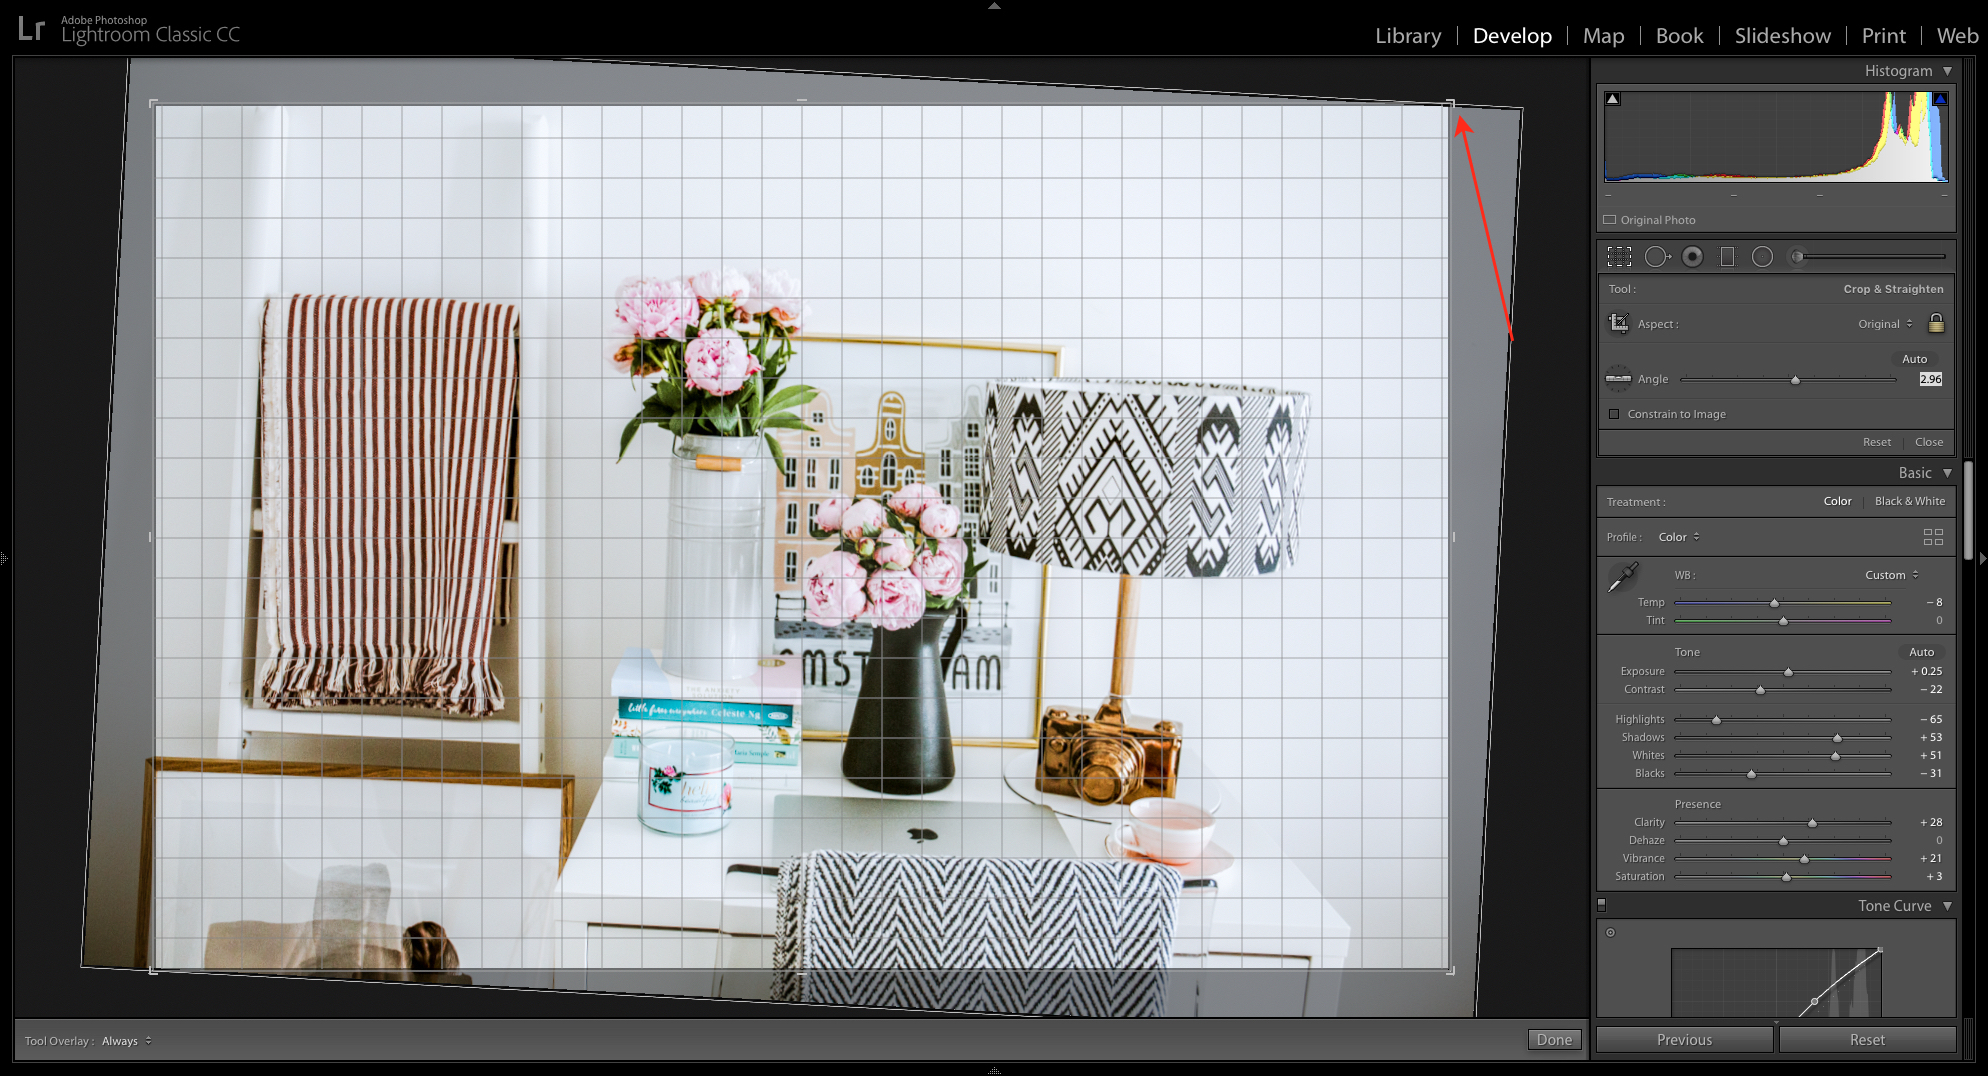
- Start in the Crop Overlay panel of the Develop Module of Lightroom.
- With just one click, Auto Mode will often do the trick and fix your uneven horizon.

Manual Mode:
- You can also correct it manually. Place your mouse outside the crop boundary until you see the Rotate Icon. Click on it, and drag the mouse to start the rotation. You'll find that a grid appears in the crop boundary when you press on the mouse. Use the grid to straighten your horizon.
- Lastly, hit enter to confirm your changes.
Straighten Tool:
- Start by clicking the Straighten Tool still in the Crop Overlay Panel.
- Clicking on the Ruler Icon reveals the Straighten Tool.
- Click and drag the mouse over the horizon in your photo to identify to Lightroom the location of the horizon.
- Lightroom will then straighten the image to align it evenly with the horizon you just identified.

CORRECTING PERSPECTIVE DISTORTION
If you have ever taken an architectural photo, then you probably have experienced this particular issue at some point. Perspective distortion can happen if the camera sensor's plane isn't parallel to the subject resulting in a skewed look. While it can happen with any photo, it's most noticeable with architectural and other subjects where there are vertical lines, and you're shooting at an angle. Have you ever shot a picture of a high rise from ground level only to have it look like the building is leaning?
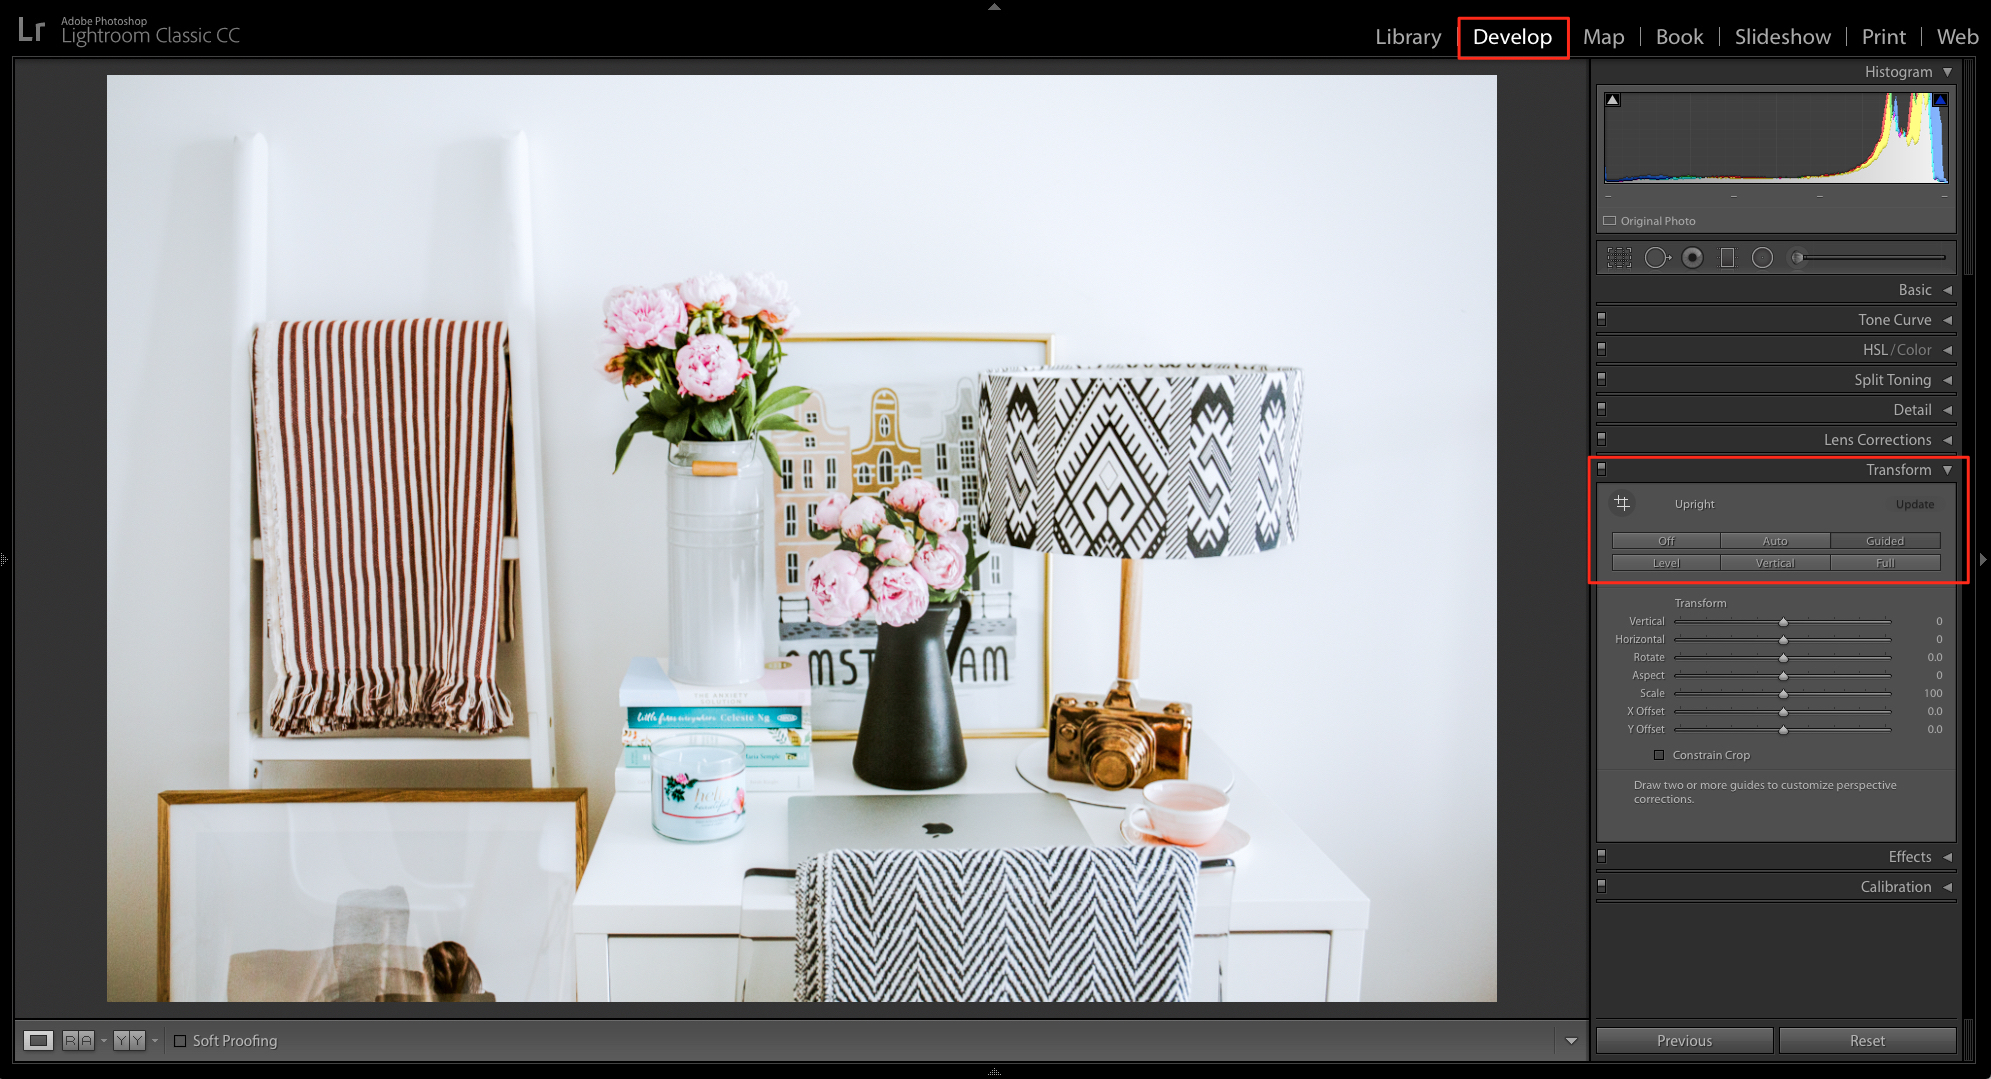
You can fix this rather common occurrence with any number of tools in Lightroom's Transform Panel.
Upright Tool:
Lightroom has four auto modes: Auto, Level, Full, and Vertical to fix any perspective distortion. Some photographers, however, don't like how inaccurate they are and prefer to skip them straight for the next options.
By drawing up your own guides, you can indicate the specific lines you want to adjust in your image. It's a much more precise way of addressing perspective distortion. If your horizon is off, then you'd draw two guides for vertical and the same for horizontal skewing. However, if you need to address both horizontal and vertical, then you would use the Guided Tool to draw four lines. Lightroom takes care of the rest!
This is a good tool to use if you'd like to further skew, rather than correct, a horizon or vertical perspective.
Transform Tools:
There are a whopping seven transform tools you can use to adjust the perspective distortion. In some cases, you'll find that you can use it along with other tools such as Upright Guided and Crop Overlay to achieve your desired effects. We suggest playing around with the various tools, so you become more adept at using them and better understand their power to change an image. For example, you might start with one tool, then migrate to a second or even a third one for further changes.
The more often you use the tools, the better you will get at identifying which one will work better for various needs.