Guide: Saving Time in Lightroom Workflow
Lightroom is one of the most comprehensive editing software available to serious photographers. It's well known for its catalog, organizing, editing, and sharing capabilities.
What it's not necessarily recognized for is being the fastest. (Recent welcome updates have increased its speed.) However, we're here to help you speed up your Lightroom workflow with these convenient tips! There's no sense in wasting time when a few easy steps can speed things up.

Sync settings
You can save time by using the Copy/Paste Settings to edit images one at a time. To this, you right-click on any image in the Develop module:
Then select Settings>Copy Settings.
Check the boxes next to the settings you want to copy.
You can then go to another image, right-click, and choose Settings>Paste Settings or use Ctrl/Cmd+C and Ctrl/Cmd+V.
The adjustments should be immediately evident on the selected photo.
But this process can be slow-going. However, you can paste your settings to numerous images to save you more time!
Here's how to do that:
Select a photo in the Develop module's filmstrip at the bottom of your screen.
Press the Shift key and select more images.
Click the Sync button to synchronize your edits from the original image to all chosen images.
Voila! You've just saved a ton of time!
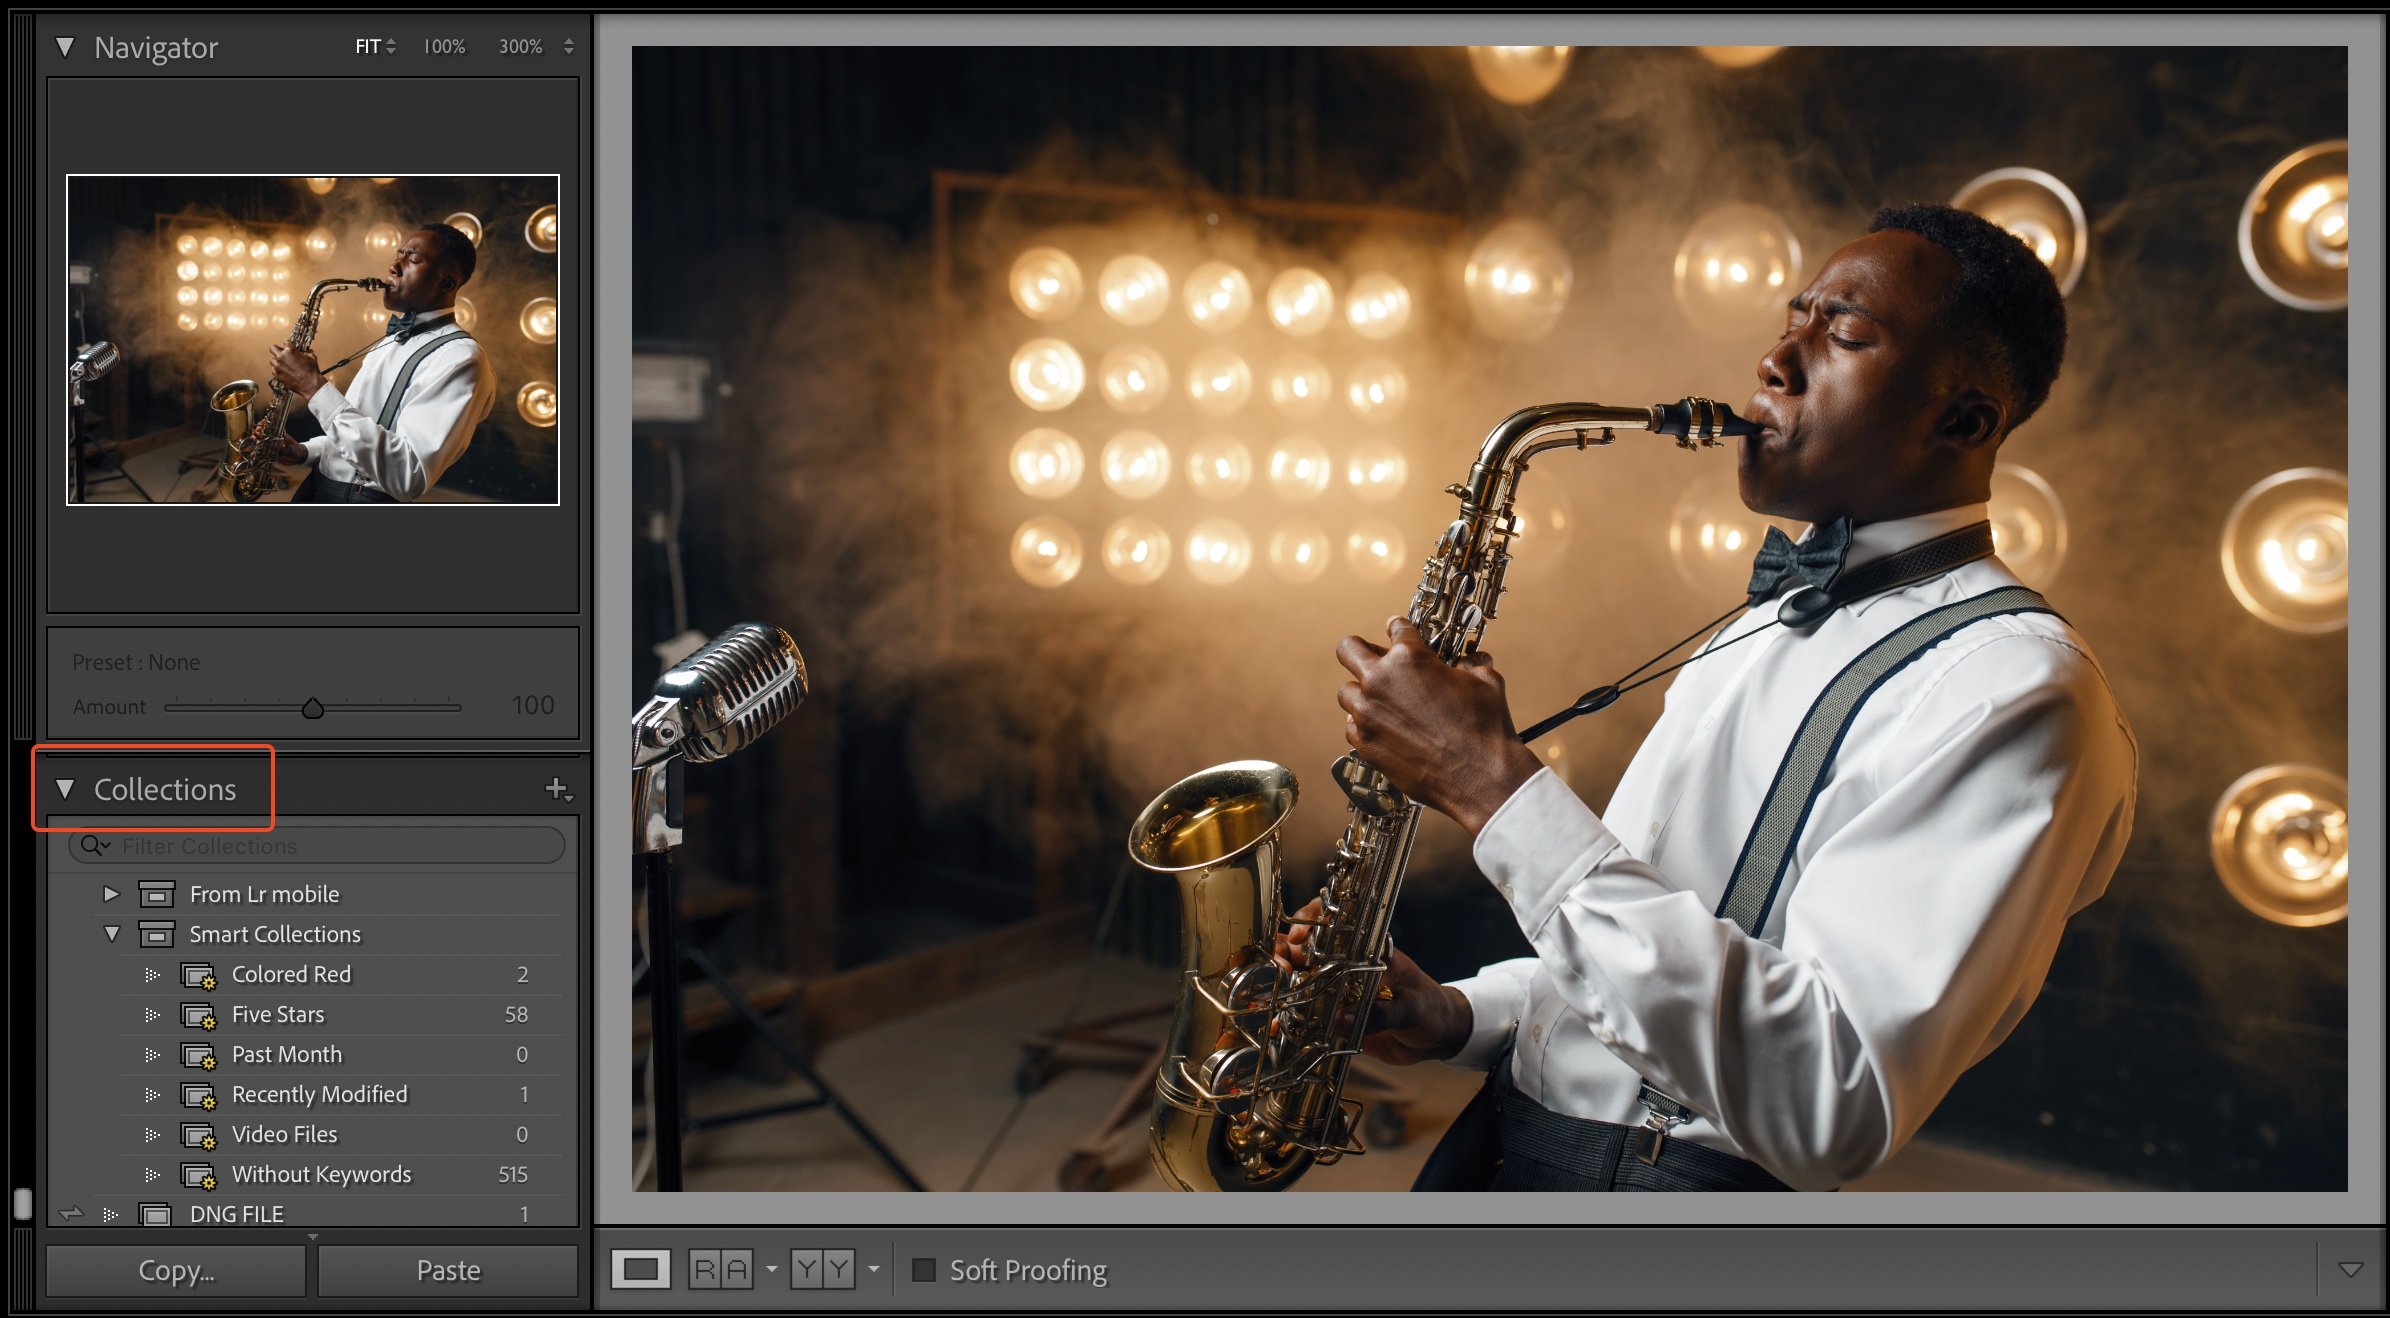
Organize with Smart Collections
Lightroom users tend to love its organizing capabilities, namely its Collections. You can create as many Collections as you want to organize or catalog your images. Did you know you can also create Smart Collections, which are populated dynamically according to your specified rules?
In other words, images will automatically sort themselves by the parameters you've set up. For example, using keywords you assign photos, they will sort themselves into the appropriate collection. This can save you a lot of time.
Here's how to create a Smart Collection:
Choose the + button at the top-left of the Collections panel.
Then select Create Smart Collection.
Then specify your parameters as required:

Apply a preset on imports
An easy thing you can do to speed up your workflow while applying an easy enhancement is to use a preset for Lightroom when importing files.
Presets allow you to apply predetermined edits to one or more images. You'll find a bunch of them in the Develop module, and, of course, you can always purchase more presets. If you're applying the same edits or style to images you're importing, use a preset to save time.
This is probably not news if you're already working with presets to save editing time. However, did you know that applying the preset when you're initially importing the image can save more time?
Here's how to do that:
On the Import screen's right side, you'll see an Apply During Import option.
Use that option to select a preset (it doesn't matter if it's a built-in Lightroom preset or one you've purchased.)
The images should now show evidence of the selected preset.
Suppose you don't like how the preset looks, no worries. You can always go back to your original. Lightroom is non-destructive, applying edits to a copy rather than your original file.
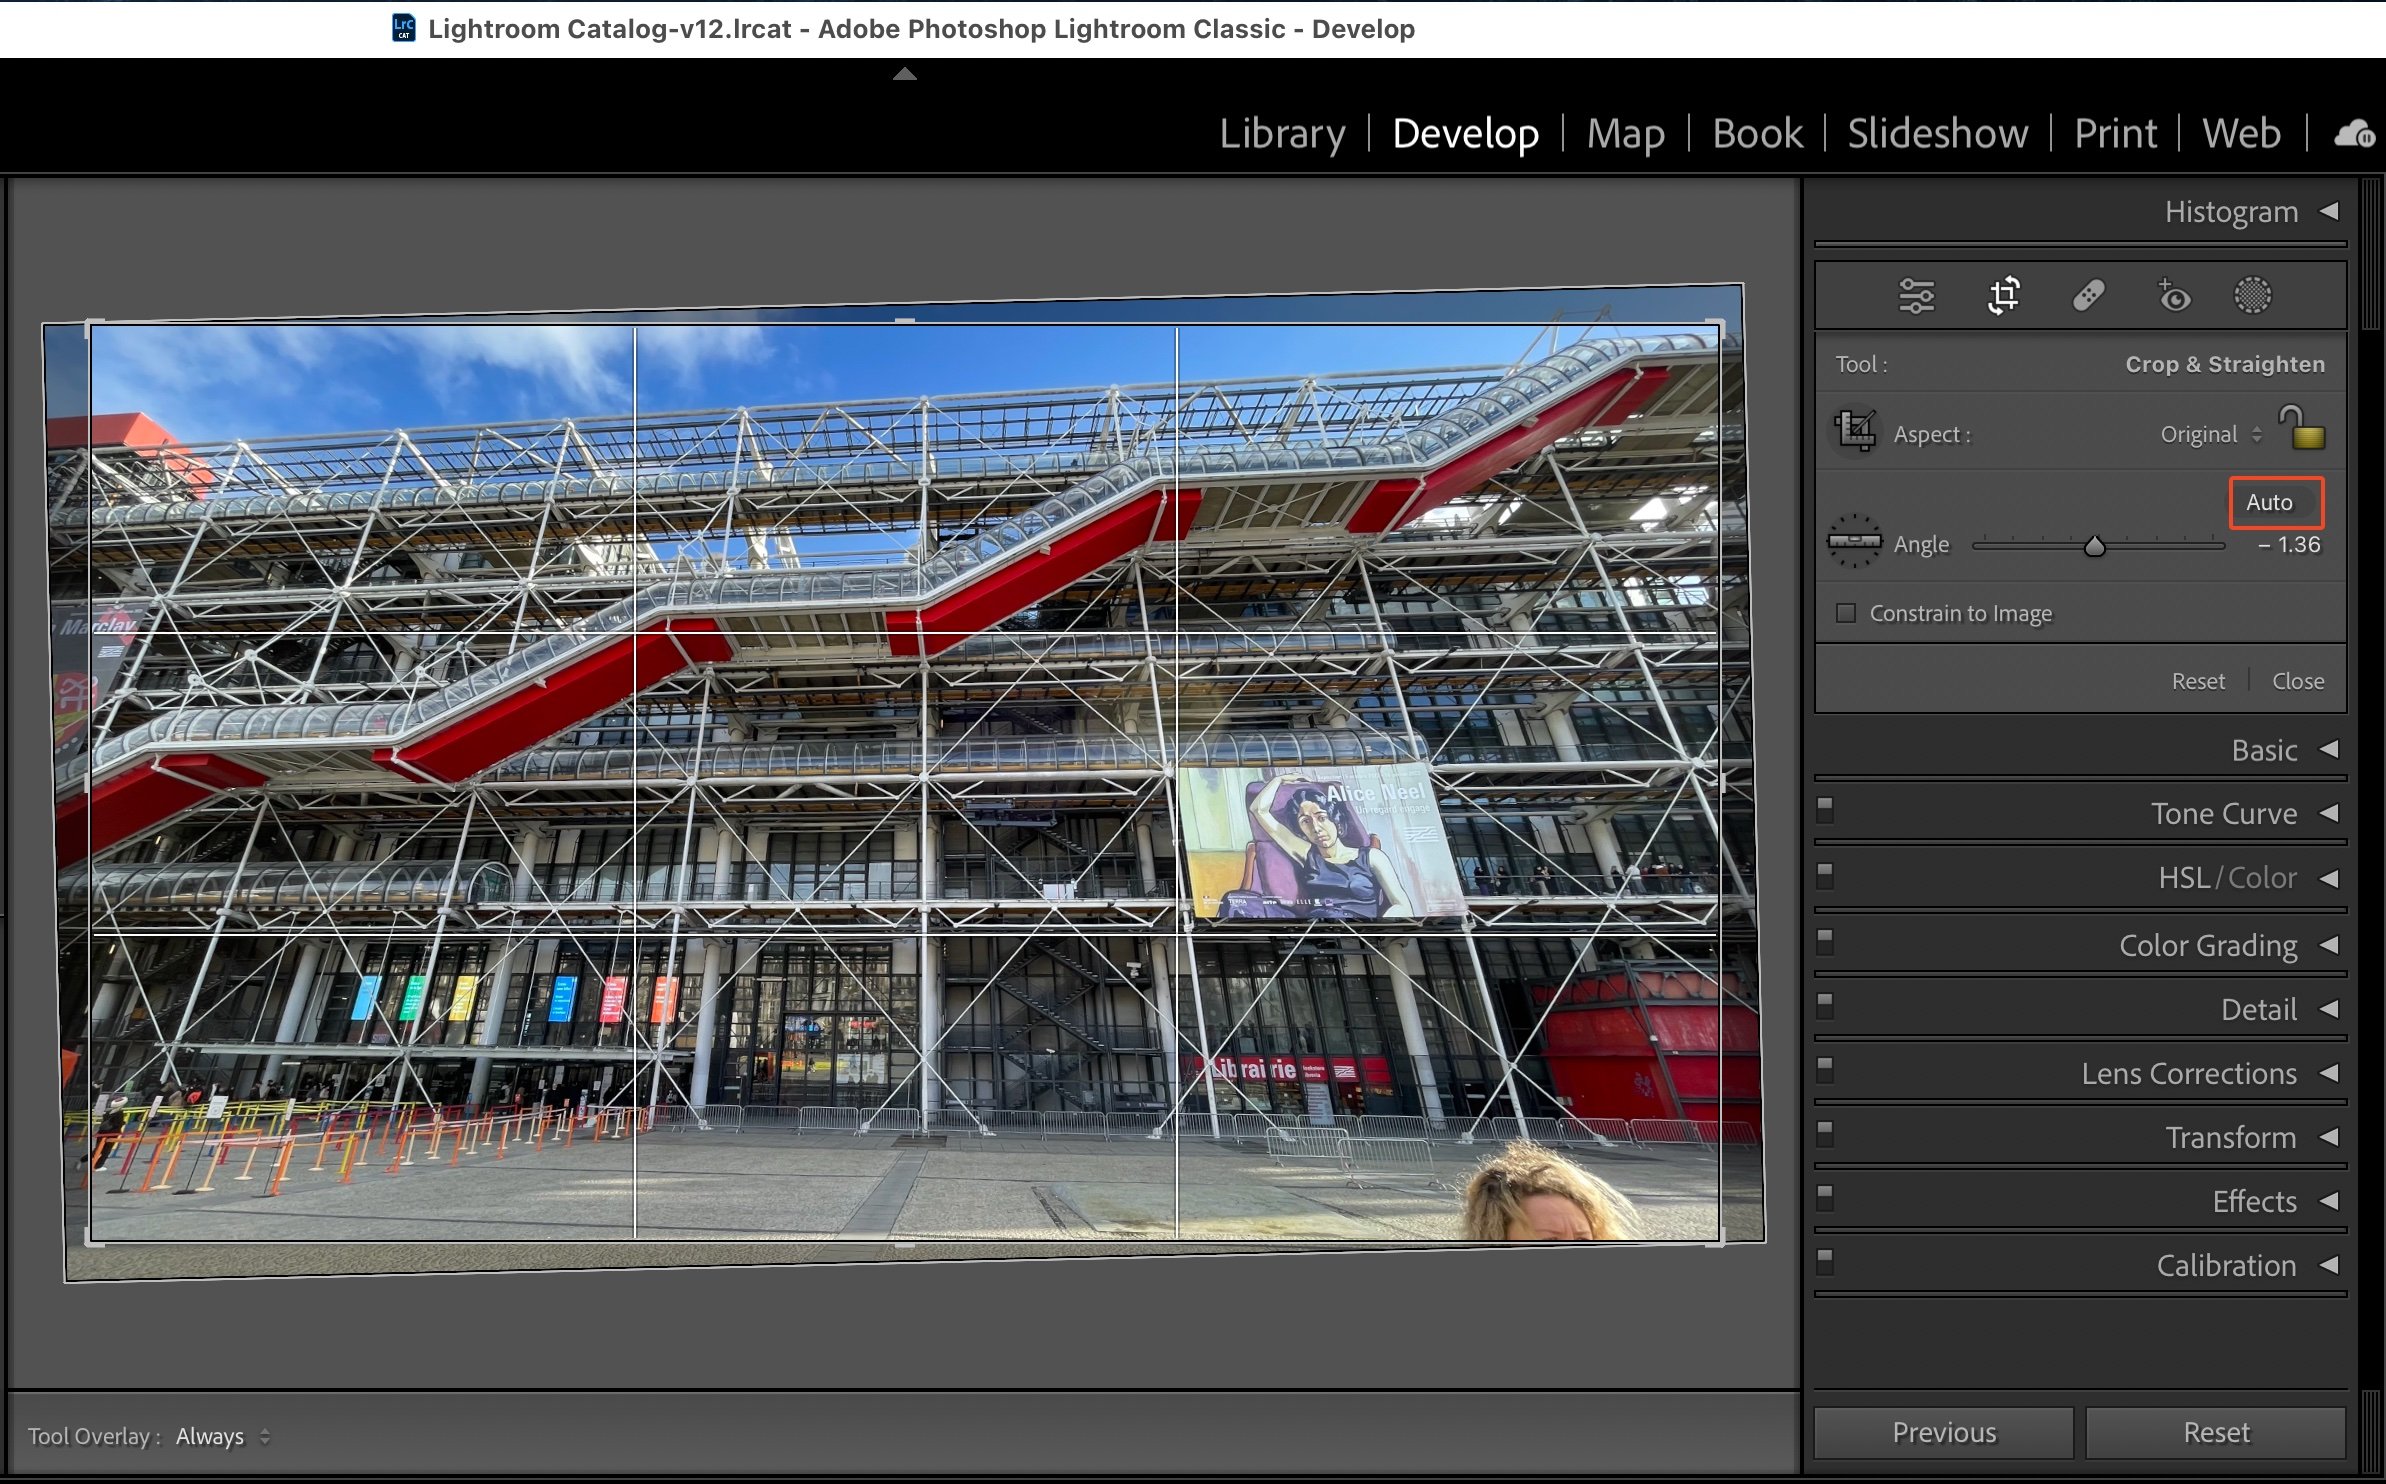
Straighten pictures
Some of Lightroom's Auto options can be helpful. Yet, many of us shy away from using them, fearing that we won't like the software's auto edits. However, there are times when using an auto option is not just a great idea; it's a time-saving one as well.
We've found that the Auto Straighten feature is well worth trying. Of all the Auto features in Lightroom, this one is pretty objective. The software uses the geographical elements within the scene, such as buildings, roads, and other straight lines, to straighten the shot.
If you don't like the results, you can further tweak the straightening or return to the original with a quick button click. Even the most seasoned photographers occasionally shoot a scene that turns out to be crooked, so this is a pretty handy feature.
Select the Crop tool in the Develop module.
Click on the Auto button.
Check the image for accuracy.
Cull in Lightroom Mobile
Take advantage of Lightroom Classic's synchronization with Lightroom Mobile by culling images in Mobile that are immediately synced to your computer. This can save you a lot of time later in post-production.
Here's how it works:
Click the checkbox next to any Collection to sync the photos with Lightroom CC. (It only works for regular Collections, not Smart Collections.)
You can now see and access low-resolution previews of those files on your phone, web, or tablet.
Next, open Lightroom Mobile on one of your devices.
Load a picture in a Collection that you've already synced.
Then click the Star icon in the right-hand corner. You'll now be in a mode where you can quickly assign star ratings or flags to images.
Tap one of the Flag or Star icons at the bottom of the screen, then swipe to load the next image.
All the edits on Lightroom Mobile are automatically synced to Lightroom Classic on your computer.
Here's a little feature that can also come in handy when assigning flags or stars:
Instead of tapping on the Star rating and Flag icons, slide your finger up or down on the right side of a photo to change the Flag status.
Slide a finger up or down on the left side to assign a Star rating.
Then swipe to the next image and repeat.

Conclusion
Through the years of working with Lightroom, we've learned that the more we work with the software, the more we improve our work. Whether using presets (theirs or ours) or deep diving into the software's many advanced features, the more we learn, the more we improve our workflow. We hope you found these tips helpful in speeding up your workflow!