Free vs. Paid Presets for Lightroom: Making the Right Choice for Your Photo Editing
Adobe Lightroom has become an indispensable tool for photographers of all levels, allowing them to enhance and transform their images through a range of creative adjustments.
One of the features that has gained significant popularity among users is the use of presets, which are pre-configured settings that can be applied to photos to achieve specific looks and styles.
However, when it comes to presets, there's a choice to make: should you opt for free presets or invest in paid ones? In this article, we'll explore the pros and cons of both options to help you make an informed decision based on your editing needs and budget.

Free Presets: Exploring the Pros and Cons
Pros - Free Presets:
Cost-Effective: The most apparent advantage of free presets is that they don't require any financial investment. You can experiment with various looks without spending a dime.
Variety: The internet is teeming with free presets, ranging from simple color corrections to complex artistic effects. This variety enables you to find presets that match your creative vision.
Learning Opportunity: By analyzing how free presets work, you can gain insights into the editing techniques used to achieve certain effects. This learning experience can enhance your overall editing skills.
Cons - Free Presets:
Quality Variation: Not all free presets are created equal. You might encounter presets of varying quality, which can affect the consistency and professional look of your edited images.
Limited Support: Free presets often lack dedicated customer support. If you encounter issues or need assistance, finding help might be a challenge.
Overused Looks: Since free presets are widely available, you might come across similar styles used by many photographers, leading to less unique results.

Paid Presets: Weighing the Pros and Cons
Pros - Paid Presets
Quality Assurance: Paid presets usually undergo more rigorous testing and quality control, ensuring that they deliver consistent and high-quality results.
Unique Styles: Paid presets often offer more creative and distinctive looks that might not be as commonly found in the free preset market.
Customer Support: Purchasing presets from reputable sources often comes with customer support, helping you troubleshoot issues and get the most out of your presets.
Cons - Paid Presets
Cost: The primary drawback of paid presets is, of course, the cost. Depending on the source and complexity, they can range from a few dollars to a more substantial amount.
Limited Trial: Unlike free presets, you usually can't try out paid presets before purchasing them. This means you might have to take a risk on a preset pack without knowing if it fully aligns with your style.
Market Saturation: Paid presets can also be quite popular, which might lead to a similar overused look if many photographers start using the same presets.
Making Your Decision
Ultimately, the choice between free and paid presets depends on your individual needs, goals, and budget. If you're just starting or want to experiment without financial commitment, Free Lightroom Presets offer a great platform for learning and exploration. On the other hand, if you're looking for consistent, high-quality results and unique styles, investing in Paid Presets for Lightroom from reputable creators can be a worthwhile decision.
Remember that presets are just tools in your creative arsenal. Whether free or paid, it's important to use them as a starting point and tailor them to each specific image to ensure your photographs stand out with your personal touch.
Conclusion
When it comes to free versus paid presets for Lightroom, photographers have a spectrum of options to consider. The decision ultimately boils down to the balance between cost, quality, and uniqueness. Both free and paid presets have their merits and limitations, making it crucial for photographers to evaluate their editing goals, style preferences, and available budget before making a choice. Whichever path you choose, presets can be a powerful asset in enhancing your images and accelerating your editing workflow.

How to make a custom Lightroom preset
Creating Lightroom presets is a creative and rewarding process that allows you to develop a consistent editing style and save time on future photo edits. Here's a step-by-step guide on how to create your own Lightroom presets:
Step 1: Edit a Photo
Choose a Photo: Select a photo you'd like to use as the basis for your preset. It's a good idea to pick an image that represents the style you want to achieve.
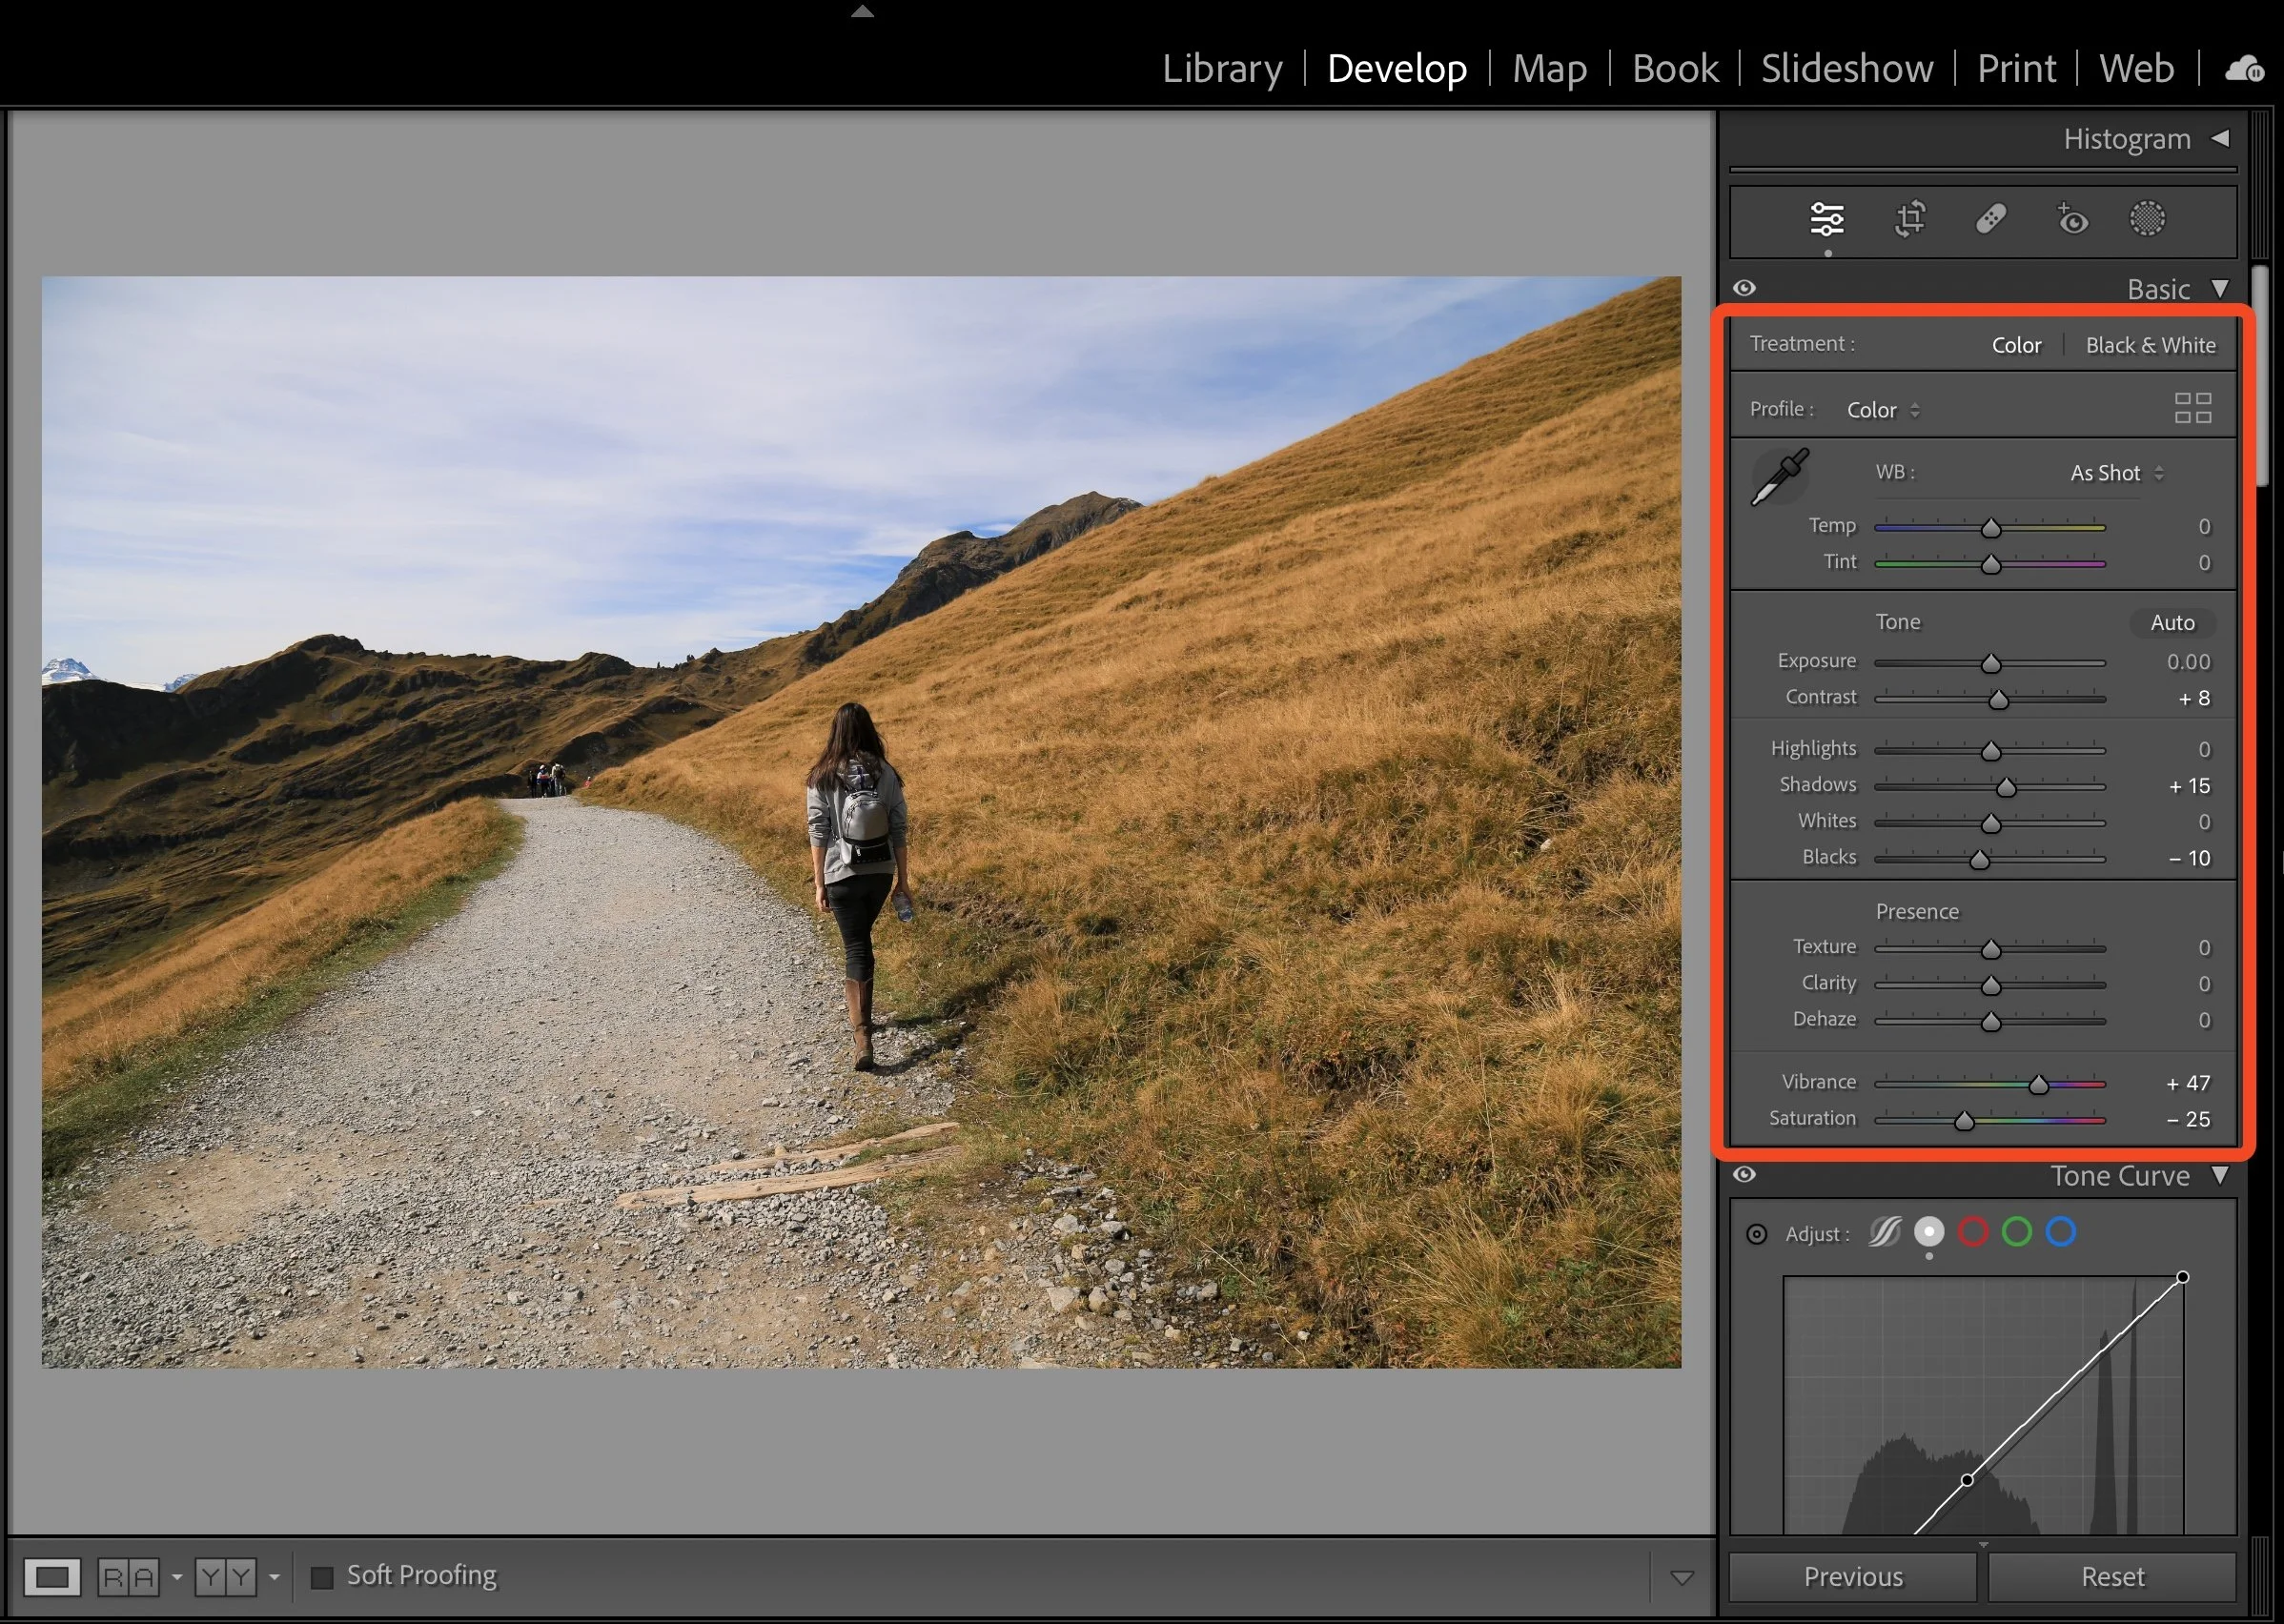
Edit the Photo: Make all the adjustments you want to apply to your preset. This can include adjustments to exposure, contrast, color balance, tone curve, clarity, saturation, and more. Remember that the goal is to create a specific look that you'll want to apply to other photos later.
Step 2: Save Your Edits as a Preset
Open the Preset Panel: In the Develop module of Lightroom, locate the "Presets" panel on the left-hand side.
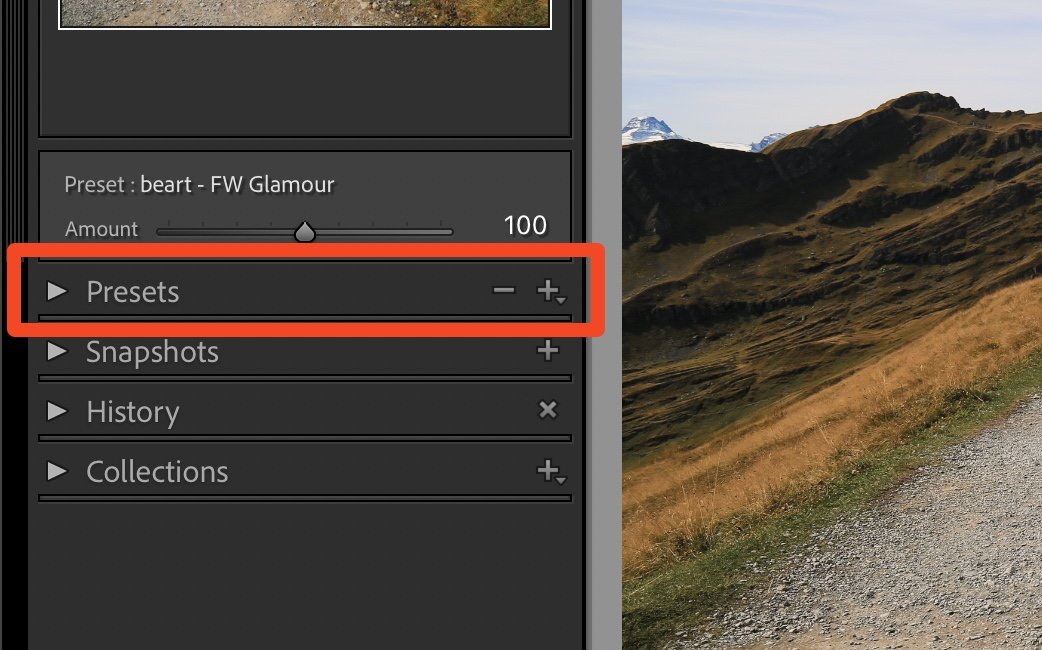
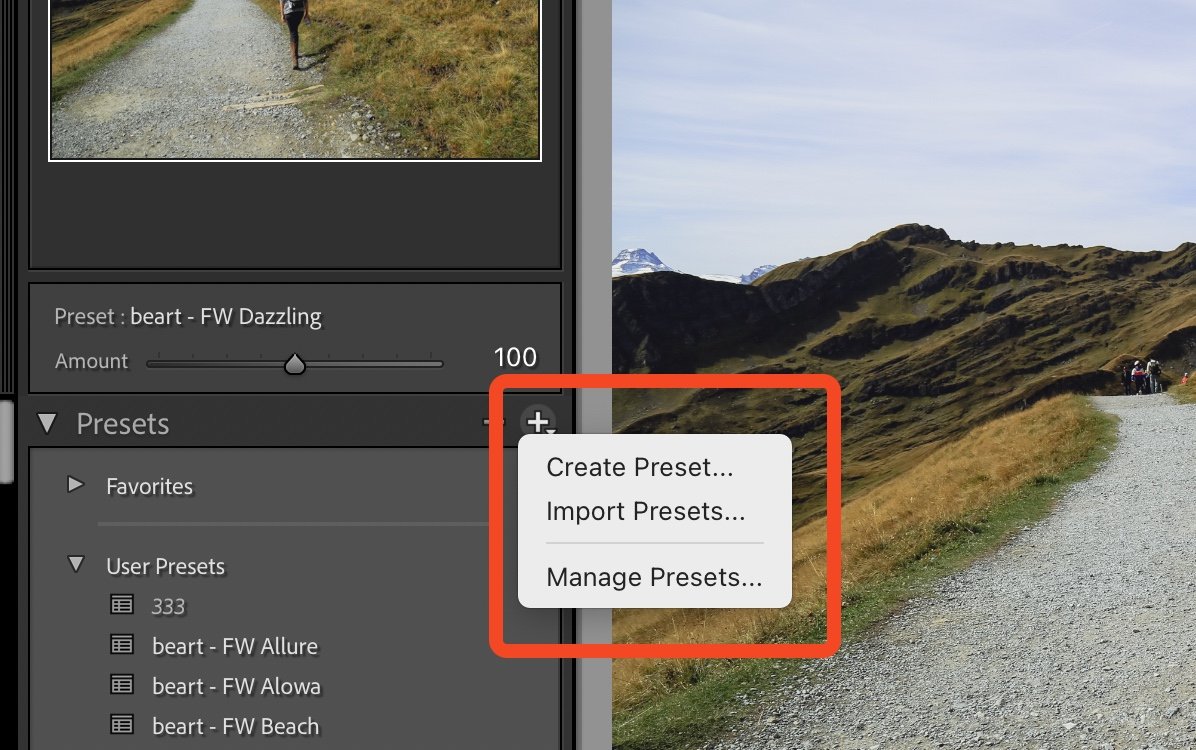
Create a New Preset: Click on the "+" icon at the top-right corner of the Presets panel. A new window will pop up.
Name Your Preset: Give your preset a descriptive name that reflects the style or adjustments you've made. This will help you identify it later.

Choose Settings: In the "New Develop Preset" window, you'll see a list of editing settings that you can include in your preset. Check the boxes next to the settings you want to save as part of the preset.

Save the Preset: Click the "Create" button to save your preset. It will now appear in the Presets panel under the "User Presets" section.

Step 3: Apply Your Preset to Other Photos
Select a New Photo: Choose a different photo that you want to apply your preset to.
Apply the Preset: Click on the preset you've created in the "User Presets" section of the Presets panel. You'll see the photo's appearance change according to the preset's settings.
Fine-Tune the Edit: Keep in mind that the preset might not work perfectly for every photo. You may need to make additional adjustments to achieve the desired look.
Step 4: Refine and Modify Your Preset
Adjust the Settings: If you find that your preset works well with some photos but not others, you can modify the individual settings in the preset. To do this, go back to the Develop module, make adjustments to the photo as needed, and update the preset.
Create Variations: You can also create different variations of the same preset by making slight adjustments to settings. This allows you to have multiple options under the same editing style.
Step 5: Organize Your Presets
Create Preset Groups: As you create more presets, you might want to organize them into groups based on themes or styles. Right-click on the "User Presets" section and select "Create Folder" to organize your presets.
Import and Export: You can import and export presets to share them with others or use them on different computers. Right-click on a preset or preset group to find import and export options.
Creating your own Lightroom presets can be a fun and iterative process. It's an opportunity to explore your creativity, develop a consistent style, and enhance your photo editing skills. Remember that presets for lLightroom, are just starting points, and you can always fine-tune them to suit each individual photo.