Using Lightroom to enhance night sky photography
Photographers often face the challenge of how to best represent what they see. There’s no better example of this than the night sky which sets up an intriguing dilemma for photographers. What we perceive isn’t the same as what the camera sees. So, which is correct or which should a photographer pursue in post-production editing: the camera's perspective or theirs?

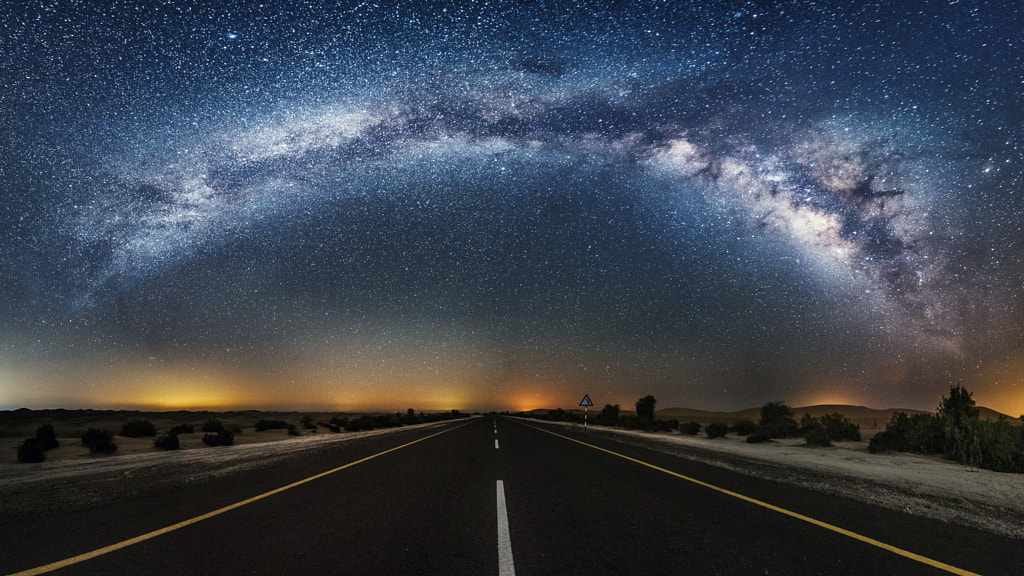
The digital camera sees what the human eye cannot when it comes to color. For a variety of scientific and not-so-scientific reasons, we tend to see more blue in a night sky while the camera sees more of other colors including green. In other words, the digital camera captures the true colors of the night sky while the human eye translates the images differently with a slight skew toward blue. Reality lies somewhere in between the two.
The dilemma for the photographer inevitably becomes which version to reflect? Alas, there is no right or wrong answer! It’s all about what the photographer wants to do.
Using Lightroom for Night Sky Photography:
Many photographers decide to show the sky as the human eye sees it. That means that they will need to do some fine-tuning during post-production relying on Lightroom to get them there. Lightroom is particularly well-suited to make the needed adjustments.
Shooting the images:
We recommend you shoot in RAW as it helps you make post-production adjustments more efficiently and effectively. Also, you need to avoid over-exposure, or you’ll kill any of the natural colors of the night sky. If you look at your histogram, it should be about ⅓ to ½ from the left. You can use a daylight white balance or change it later using the Basic panel in Lightroom.
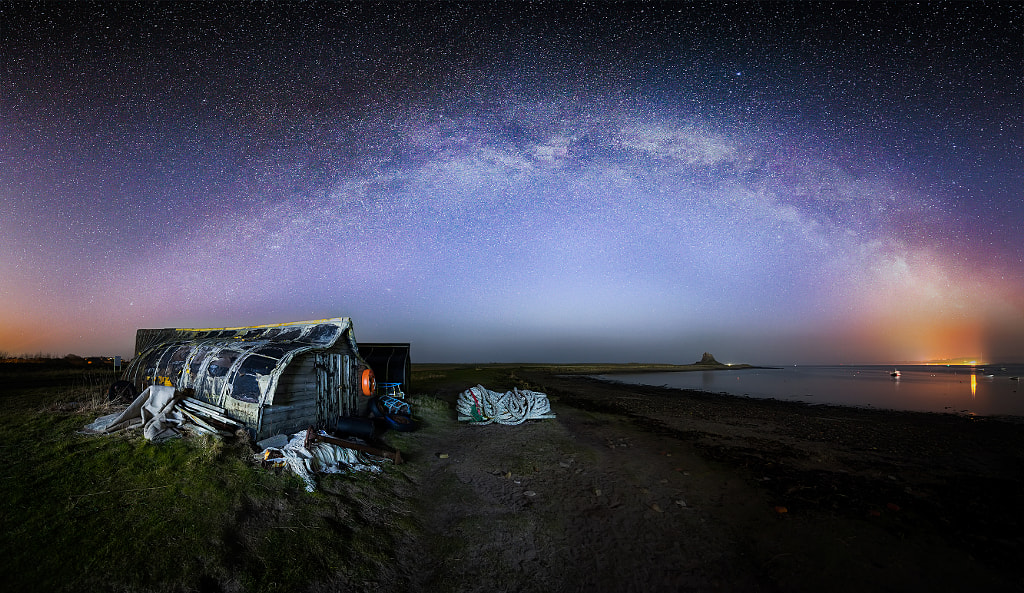
TIP: Because it can be challenging to capture all the details in a night sky, and then make color corrections easily, some photographers opt to shoot two images, one for land and the other for the sky, exposing them accordingly. This allows them to capture all of the details. Then, they adjust their images in post-production by using the Tone Curve panel. That will enable them to adjust for sky color while not automatically casting a blue hue to the color of the land. To adjust the color of the land, use the Temperature slider in the Basic panel. Once you've edited both images, you can combine them into one.
Adjusting for colors:
Unedited images might skew toward green (what the camera sees), most photographers opt to reflect bluer as the human eye sees the night sky.
- To do this, you can use the Temperature slider in the Basic panel. If you shift to about 3,200 Kelvin, you’ll be able to generate the same deep blue you’d see in a cloudless night sky. But, you’re not quite done, yet. You’ve shifted to a bluer sky, but in doing so, you’ve made everything else in the image blue as well! It’s not likely everything else in the image needs to be blue.
- To resolve the issue of everything being blue, you’ll need to open the Tone Curve panel and work on adjusting the colors individually. Under the word Region, you will need to click on the small icon at the very bottom right corner. That switches you to Edit Point Curve mode.
- Once you’ve switched to Edit Point Curve, set it to Linear.
- Click on the disclosure triangle next to Channel: RGB and select red. You’ll then need to place a point on the curve at about roughly ⅔ of the way up without moving the point. Doing that preserves the colors of any highlights in your picture including the Milky Way sky and stars. Click a place on the curve about ¼ of the way up and drag it down slightly.
- Switch to the green channel and place the same points and also drag down slightly the second lower point. It can be tricky to eliminate or diminish a green cast without also changing some of your sky colors to a purplish hue. You will likely need to play around with sections of your sky.
- For blue, switch to the blue channel, repeat the steps of placing the same two points. However, instead of dragging the lower point down, you’ll want to go up slightly.
TIP: Sometimes it can be difficult to make minimal adjustments to any of the colors on the curve to any of the colors. Try holding the ALT key while dragging a point to give you more control of the distance.

Create a preset:
You will need to play around with these for a bit to get the colors just as you want them. Once you do, we recommend you save the changes as a Lightroom preset to save time in the future. However, because even a difference in the light of a night sky can impact the image, you might want to create several presets.

Photographing the night sky is more of a lesson in subjectivity than objectivity. What you see represented in the photographs is usually more reflective of the photographer’s eye than the camera’s. But, without sophisticated software like Lightroom, it’s difficult to capture what the human eye sees accurately.