Understanding the HSL Panel in Lightroom CC
If you are struggling with the saturation, hue, or luminance of colors in your images, there is a way to adjust them without throwing everything else off in the picture.
Sometimes when you expose a shot of the subject’s skin tone, you later find that you have skewed or sacrificed the integrity of other colors. By addressing one problem, you’ve now created a different one.
What can you do? In Lightroom’s little box of tricks and tools in the Develop module, HSL is the secret to balancing your colors to achieve your desired results without spending too much time.
Surprisingly, too many photographers aren’t making use of these tools, so here are some basic tips on using Lightroom’s HSL.
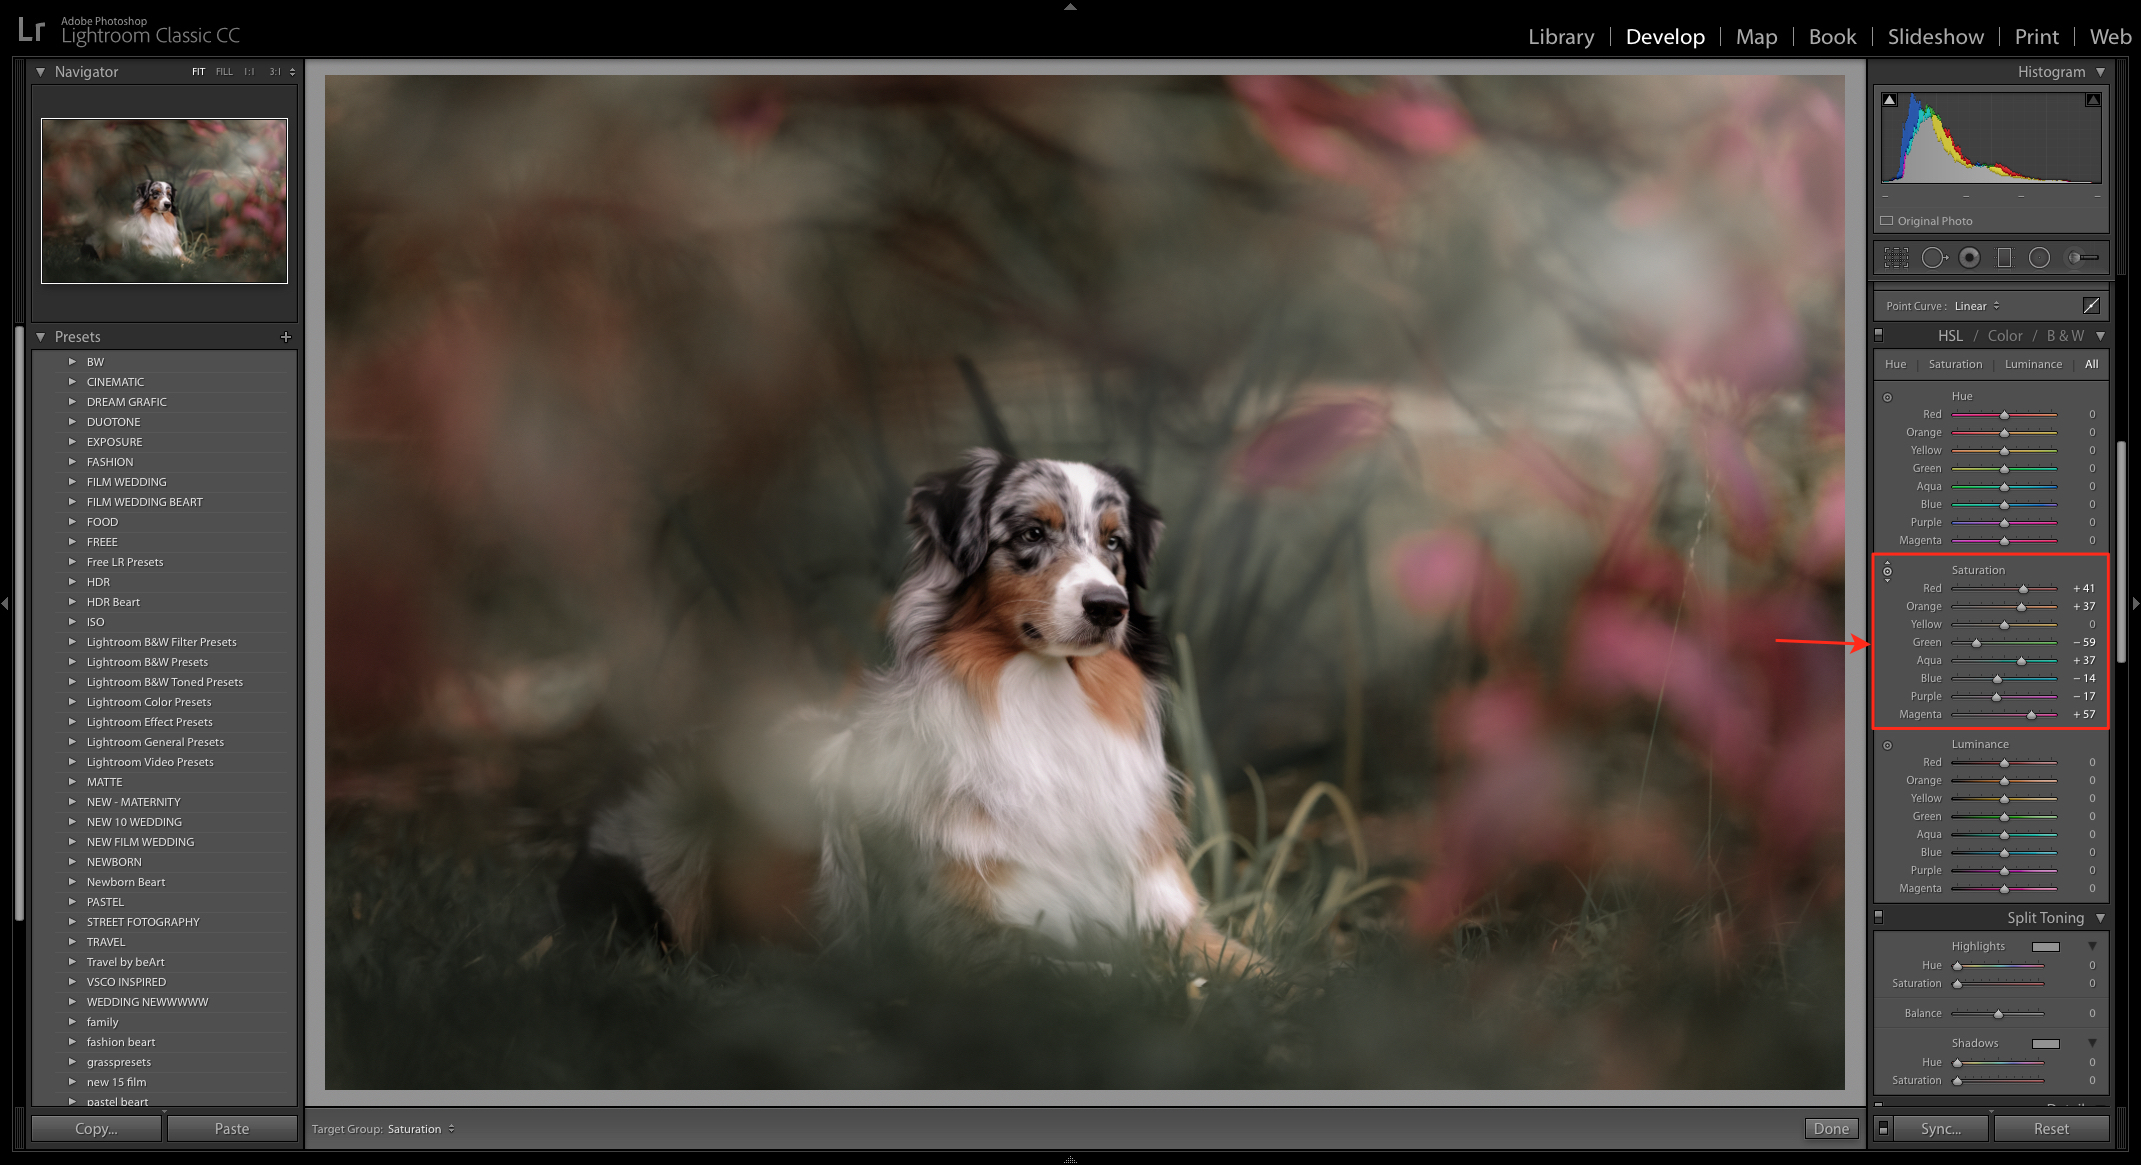
If you open the Develop module, under the Histogram, you’ll see Hue, Saturation, and Luminance listed. Let’s address each one and how you can use them to your advantage.To adjust a color’s intensity or attributes, you can use the Hue and Saturation sliders.
HUE:
Here’s the definition of hue which is important to understand how to work with it:
a: color
b: a gradation of color
c: the attribute of colors that permits them to be classed as red, yellow, green, blue, or an intermediate between any contiguous pair of these colors when we’re referring to hue, we mean the true color.
Let’s say you’d like your green grass to look greener and less yellow or blue. You would adjust the green and maybe the yellow or blue hues, to achieve the exact green you want. To change the hue, slide the tab in either direction. It can make a color look more blue, more yellow, etc. Experiment with sliding the tabs in both directions, and you’ll get an idea of what you can do with the hue of an image. You can even use it in small increments to adjust for skin tone.
SATURATION:
Adjusting for saturation can help you decrease or increase the intense colors of an image. For example, if the colors of an image appear “washed out,” you can adjust the saturation to intensify the colors. Or, if you’d like to lessen the intensity instead - let’s say the green grass looks too rich - decrease the saturation to diminish the intensity. You can even remove all color to the point of making it a black and white.
LUMINANCE:
Luminance is likely one of the most frequently used of the three as it adjusts for the light or darkness of a specific color thanks to its range of colors listed. You don’t need to over-expose an entire image just to lighten or darken a particular color. Let’s say the color of the trees in the background is darker than you’d like. Adjusting the luminance of the green will lighten it without over-exposing the entire image or the other colors. Luminance allows you also to make things darker when they’re too bright.
The more you work with the HSL sliders, the more proficient you will become. Just like with other Lightroom tools, we recommend experimenting with them outside of actually needing them. It takes the pressure off, and you can feel free to try different looks with your images.


