
10 Steps to Create a Photo Album using Lightroom's Book Module
You can use the Lightroom Book Module to create a photo album you will treasure for years. Of course, once you perfect the process, you can also develop ones you can sell to clients.
Remember the old saying of the cobbler's kids has no shoes? Well, it can apply to photographers as well, and you'd be surprised how many don't take the time to photograph their own family! Here's your perfect opportunity to do something with the images you do have and create a special family album.

Not only can you make creative and beautiful albums with Lightroom Book Module, but you can also print them through Blurb, a publishing company specializing in on-demand books for a reasonable price. You always have the option, though, to print them yourself.
Creating an album:
Step 1: Create a Collection

To make it easier, build a collection within Lightroom of the pictures you plan on using in your album. One clever thing Lightroom lets you do which can be extremely useful when you're going to create a photo album is set up a Smart Collection using a keyword. That way, it automatically finds and saves to that collection anything you've branded with the keyword.
Step 2: Save & Name

You can set up your Lightroom preferences so that when you open Lightroom Book Module, you’ll see your Collection photos already laid out as open book pages.
Go ahead and SAVE your book, so you don't lose any changes you make.
Just click on the button found in the top-right corner: Create Saved Book.
Next, you'll need to name your book and select where you want to save it -- in Lightroom. We suggest keeping it within the collection; you're working with to make it easy to find in the future. To do that, select the Inside checkbox, and in the drop-down menu click the collection you’re using. You should now see the photo book in your collection on the Collections panel.
Step 3: Viewing your book

Now, you can select your view through the various "Views" options it offers you in the bottom toolbar.
Multi-page: It automatically defaults to the Multi-page view where you can see your entire photo book. There, you can enlarge or shrink the size of the pages by using the Thumbnails slider on bottom-right.
Spread View: This one shows how side-by-side pages will look in your book. It gives you a closer look and allows you to browse your pages using the arrow keys on the toolbar at the bottom.
Single Page View: This gives you an even closer look at the individual pages.
Step 4: Book Settings

On the right-hand side, you'll see the Book Settings panel where you can select the format of the book: Blurb, PDF, or JPEG. Here's a look at each option:
Blurb: You can publish and print directly through Blurb as we stated earlier. You can select the size of your book as well, change the kind of paper, and the book cover.
PDF or JPEG: Your options are different if you choose PDF or JPEG in the Book drop-down; however, you can still change the size of the book and cover. You'll also be able to look at quality and resolution.
Step 5: The Layout

It's time to get creative now that you have the essential basics down! In the Auto Layout panel, you can customize the appearance/layout of your book.
For some reason, the default is set to "left blank, right one photo" which means that the left page is blank and a photo is on the right-side page. But no worries! You can change the presets by selecting a different one (don't expect many, though.)
If you'd like to create your own layout and eliminate the default, just click on the "Clear Layout" button found in the Auto Layout panel. Voila! You can start fresh with your own layout - within their presets offered, of course. Here's how.
Select Edit Auto Layout Preset within the Preset drop-down menu. A dialogue box will pop up, and in there you can select your page's layout
It's relatively intuitive from here on, and we suggest trying various designs. For example, click on Fixed Layout within the Left Pages drop-down. Several layouts will come up. Choose the one you like.
Tips
If the proportion of your page and photograph aren't the same, you can opt to “Fill” from the Zoom Photos drop-down.
Within Fixed Layout, you can opt to work with more than one photo on a page at a time. The template will change to reflect your selection.
You can do the same for the right-side page, but don’t forget to choose to Fill within the Zoom drop-down before you hit Save. Once you do save, you'll be asked to name the book.
At this point, we suggest naming the preset to reflect the layout you created. For example, left, two photos; right, four photos. Then, when you later click Create, you'll find that the Auto Layout panel has saved your new preset! To apply it your book, click on the Auto Layout button. (If you don't do these final steps, your book will reflect the default set up of "left blank, right one photo.
If you don’t, you’ll find your book will still be in the default setup of “Left Blank, Right One Photo.” This is what my view looks like after clicking Auto Layout.
Step 6: Individual Page Layout

You can also change the individual page layouts to customize your book further. Here's how:
Select the page you'd like to customize block by clicking on the arrow on the Page panel. You can then choose from any of the layouts you see.
Step 7: Further Edits:
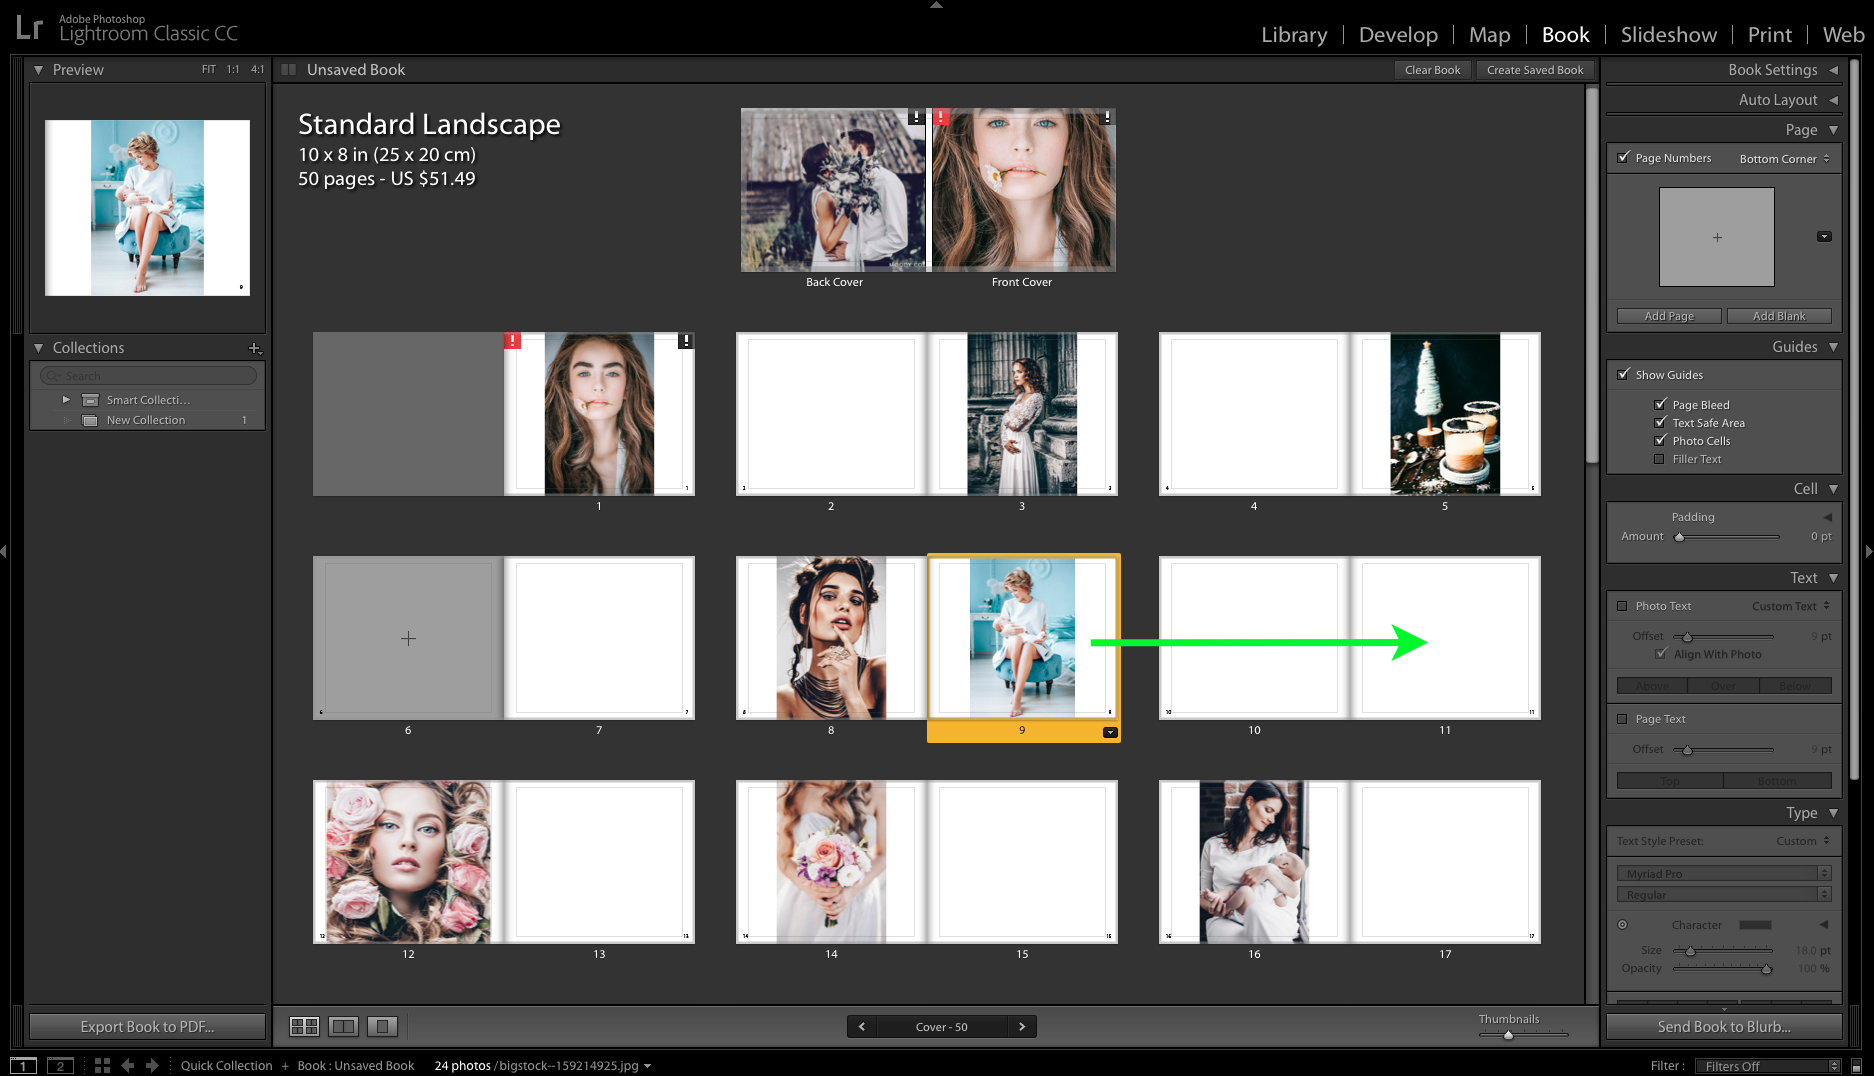
If you'd like to change a photo's placement on a page, simply drag it within the template to where you'd like to move it.
To zoom an image in or out, just select on the image, and a zoom slider will appear. Drag the marker to zoom in or out.
We recommend reviewing your book carefully in the Spread View before going to print. It's the best way to ensure the book is as you'd like it to be.
If there are photos you'd want to move to a different page or a group of pictures you'd like to keep together, you can do that as well. You don't have to stick to Lightroom's groupings. Just drag and drop the images inside the Panel in which they appear.
Want a photo in another panel? Just drag it to the panel you want and drop it. If you drop it on top of another picture, it will swap those pictures.
You can remove a page by right-clicking on the page and selecting Remove Page.
Step 8: Add Text

Each time you select a page or picture, you'll see a small button which says: “Add Page Text” or “Add Photo Text." Click it if you want to add text and type.
To change the default font, size, color, opacity or alignment of the font, select the text and make the edits to the new font within the Type panel.
Lastly, you can change the placement of the text by selecting Above, Below, or Over the photo.
Step 9: Backgrounds
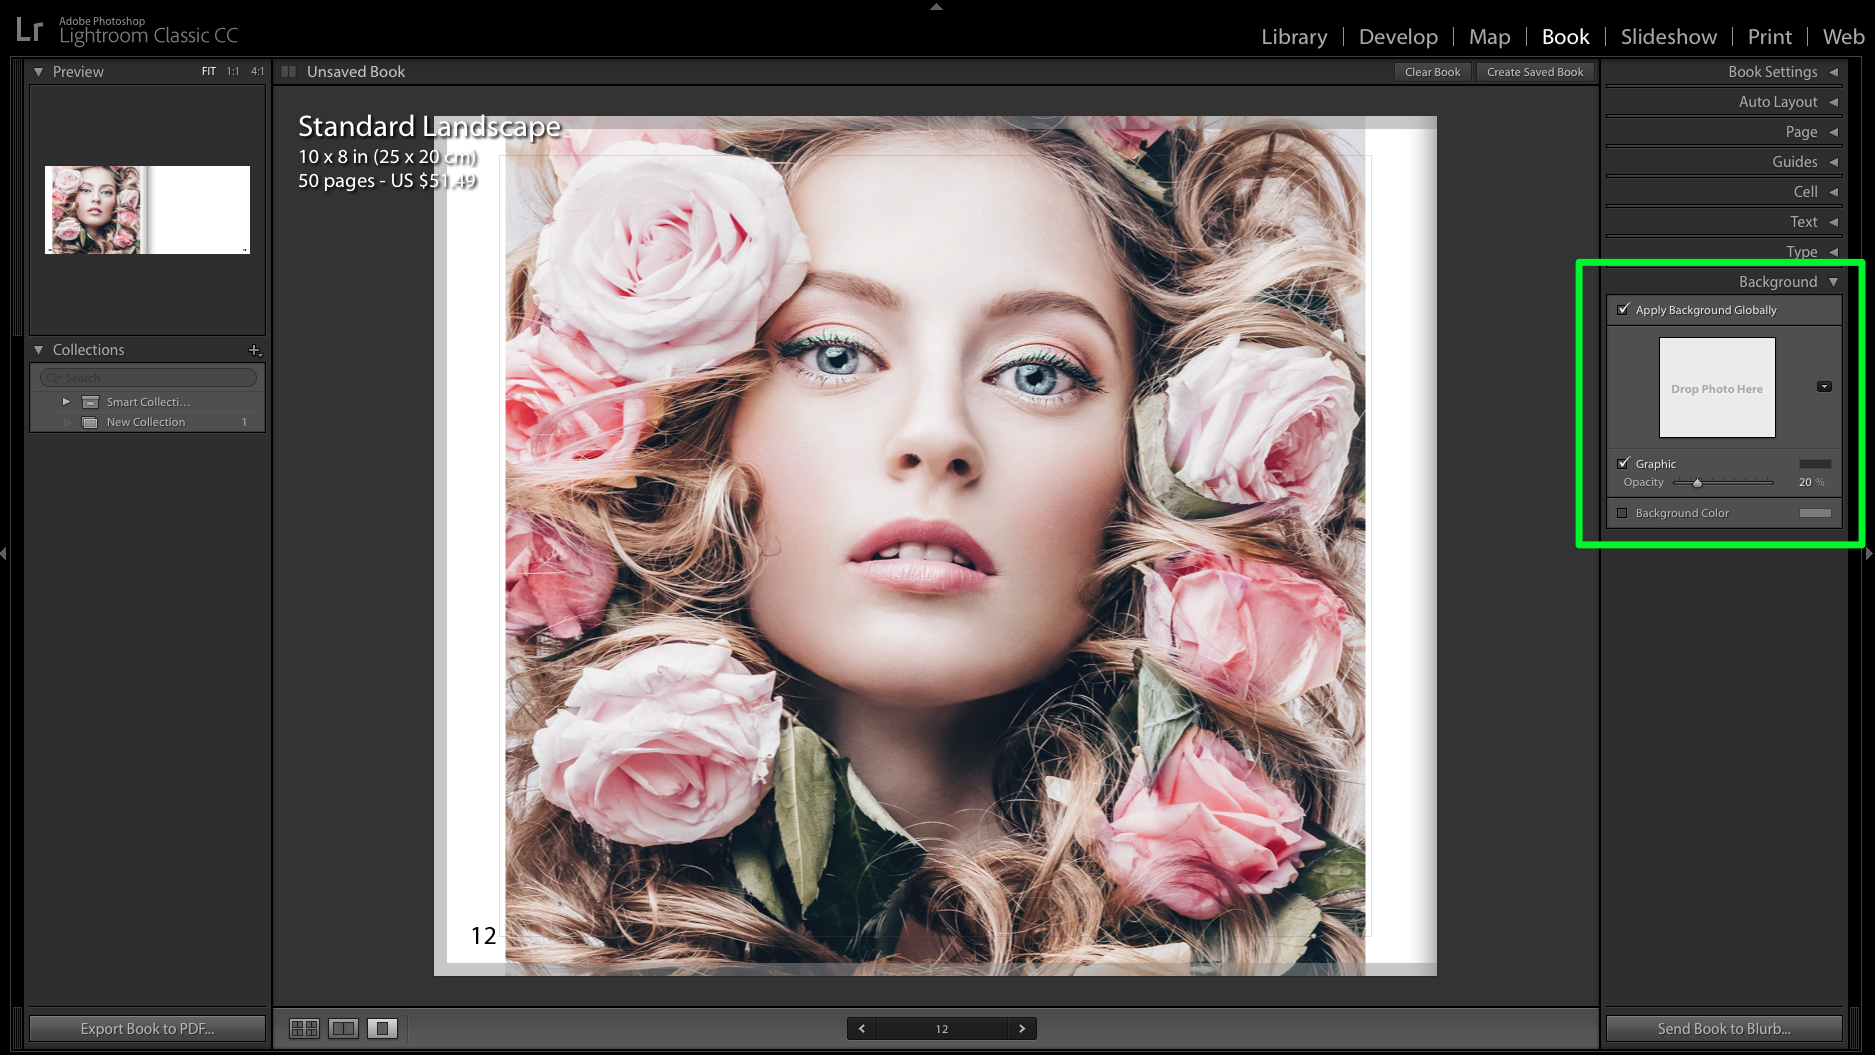
You can get even more creative by changing the background of your pages within the Background panel. Typically, adding a background means it's only added to the selected page you're working on. If you'd like to add the same background to the entire book, check the Apply Background Globally option.
Color Background: Check the Background Color option if you'd like to adjust the background color. You can select a color or even add a HEX code.
Image Background: You can use an image as your background by dragging it from the Filmstrip and dropping it the "Drop Photo Here" within the Background Panel. You'll see it immediately appear as a faded background. Don't worry, though; you can adjust its opacity within the Opacity slider at the bottom.
Graphics Background: If you'd like to add graphics, instead of an image, that's pretty straightforward as well. Simply click on the arrow icon in the Background panel to reveal a side menu. Change the default setting from "Photos" to whichever subject you'd prefer such as "Wedding" and select.
Step 10: Publish your book
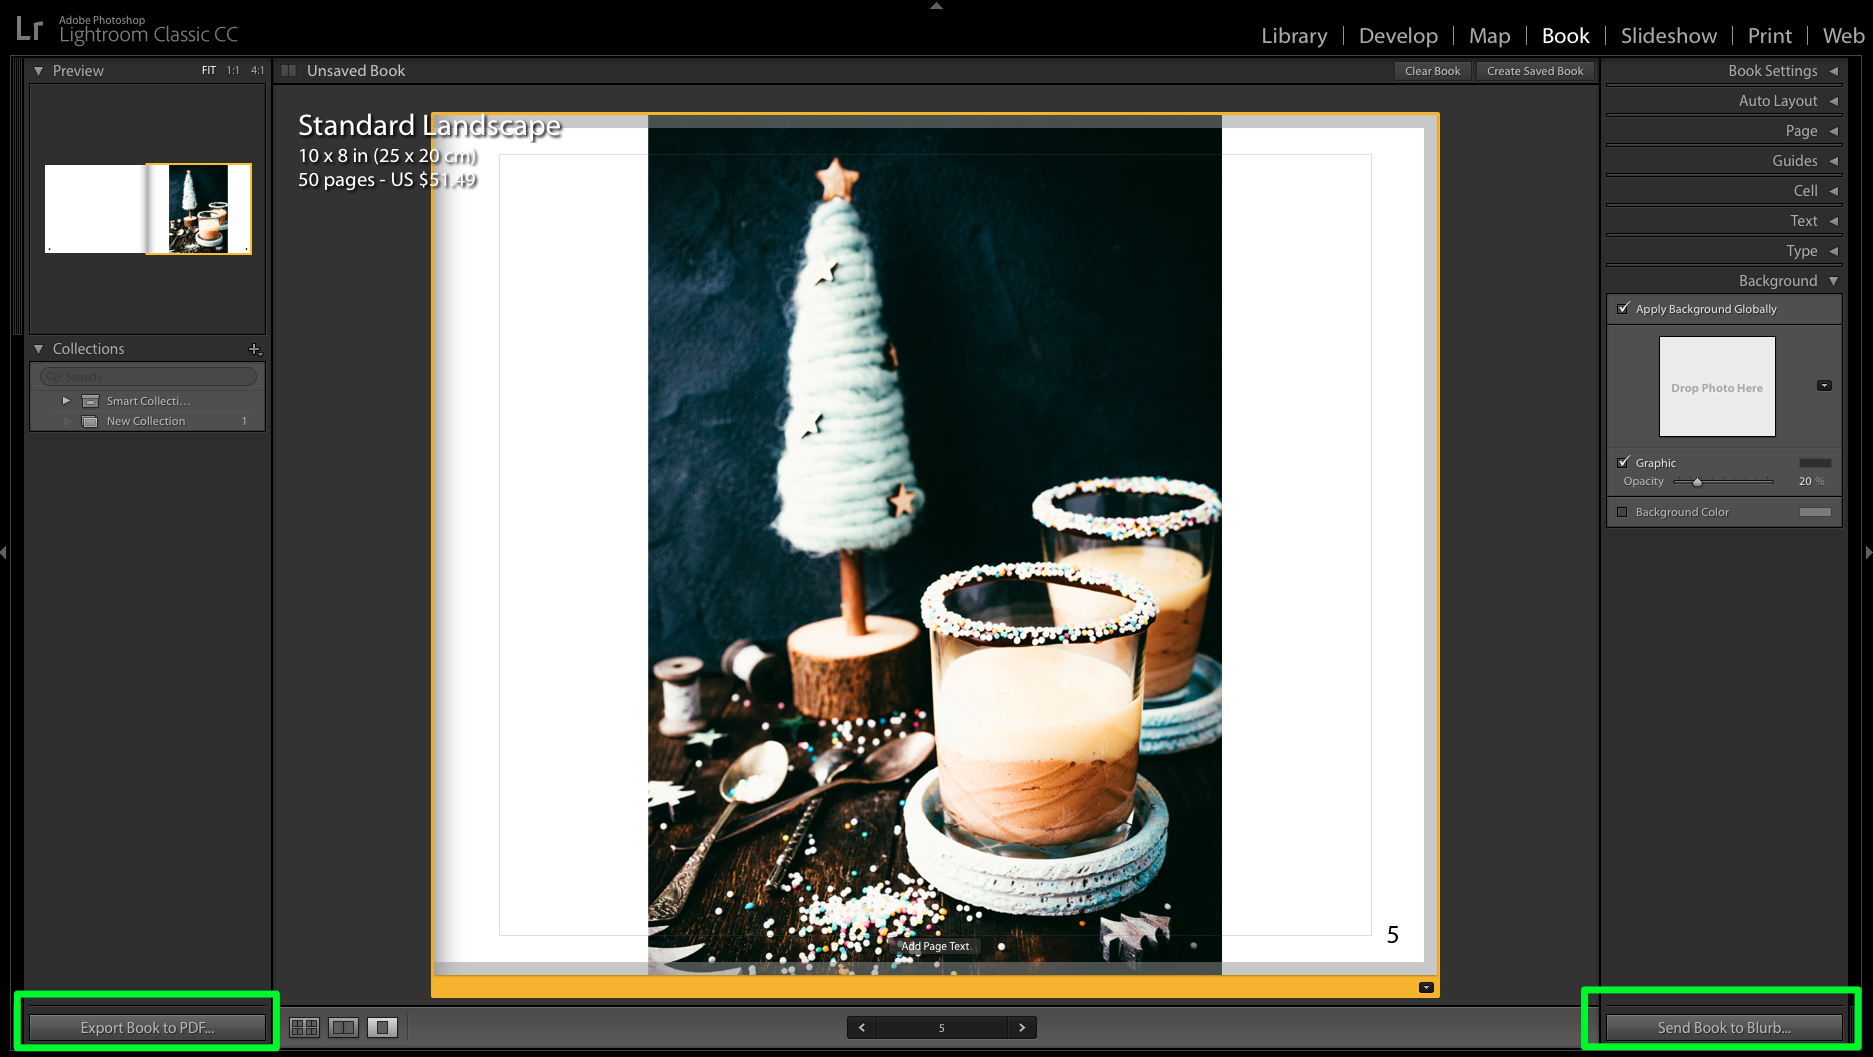
Once you've added all your photos and made all your adjustments, it's time to publish/print your book. To send to Blurb, just select the Send to Blurb button at the bottom of the panel. When you do this, a window will open showing you the final look of your book as well as your price. You will need to create an account and sign in if you don't already have an account.
If you prefer the PDF or JPEG option, you can Export Book to PDF/JPEG as your option.
That's it! Congratulations, you've just created a beautiful photo album using Lightroom's Book Module!


