
all that you need to know about filter bar in lightroom
Sorting images in Adobe's Lightroom is a breeze! It's easy to locate an image, filter them by criteria, then sort and organize them.

Why is this such an asset in a software program? It's important because it can save you a lot of time. For professional photographers, especially, time is money. The less time you spend looking for an image, the more time you can devote to processing images and getting them to clients.
Let's take a look at using the filter tool in Lightroom to help you maximize its potential. We'll start with the basics of the Filter Bar.
Lightroom Data
When you import an image into Lightroom, it automatically extracts and saves image metadata in a database known as the Lightroom catalog. The saved metadata includes EXIF data like lens focal length, capture time & date, and exposure information. This data collection is vital to the Lightroom user because all of it is searchable data. Lightroom can quickly comb through the collected data. With a few clicks, you can find the image you're searching for using the Filter Bar.
What is the Filter Bar?
The Filter Bar is how Lightroom filters through the imported image metadata, specific text, certain parameters, and attributes.
There are four tabs available as filters:
Text: search for specific text in image filename, title, keywords, etc.
Attribute: filters images by flags, rating, edits, color, and media type.
Metadata: applies one or more levels of customizable filters using the image metadata
None: disables all filters
You should note that Lightroom looks for images in whatever folder you're browsing at the time, rather than searching the entire catalog. If you want it to explore the whole database, you need to click on the root folder that contains your images or don't use the Folders tab/sub-module in Lightroom.
How to Locate the Filter Bar
You can access the Filter Bar only through the Library Module*.
Here are two ways to access it in that module:
Click the "\" key on your keyboard.
Use the "View" menu to show or hide it by clicking the second option from the top: "Show Filter Bar" to make it appear at the top of the Image Grid.
*It is only visible/available in Grid View. If you're in Loupe View, click on the "\" key to switch you to Grid View and then show the Filter Bar.
More on Filter Tabs
As we said initially, there are four filter tabs. However, only three will allow you to filter images: simple text, attribute, or image metadata. You can conduct a more thorough search by combining two filters together if you want. This works for a deeper dive into searching as long as there are images that meet the criteria you specify. Ultimately, by combining filters, you can conduct more efficient searches.
Let's look at the three filters you can use to search.
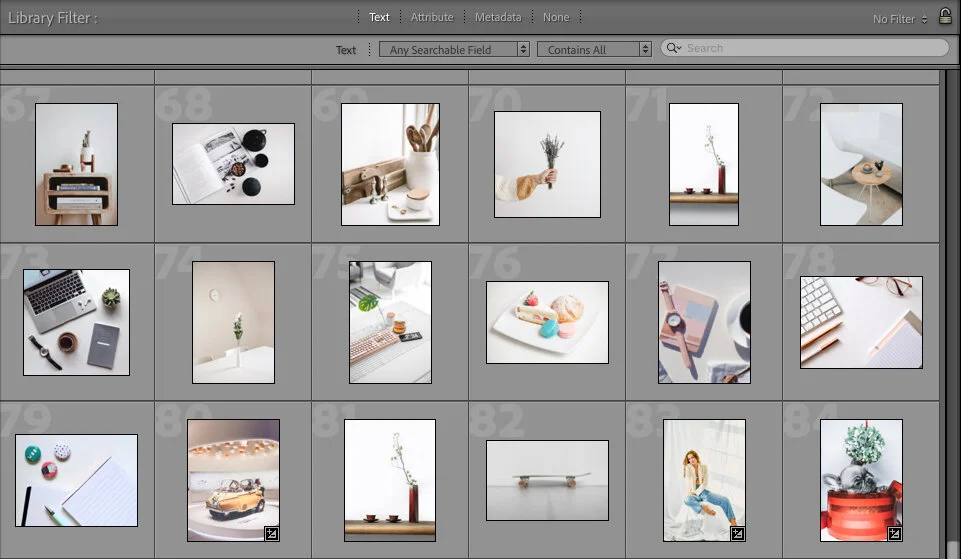
Filter Based on Text
Most photographers begin with a text filter search - if they're unsure where to search for an image or images. It's an easy-to-use feature using specific words (text). Unfortunately, easy-to-use doesn't necessarily mean it's the most efficient of the filters.
For a text filter search to be successful, your catalog (and the image) must have some kind of text. Any image imported without text (like titles, captions, or keywords) or without metadata/EXIF will not be found by a text filter search. However, a text filter is excellent for finding any named or tagged images, including ones with metadata.
To use:
Select "Any Searchable Field" from the "Search Target" drop-down in the default setting.
Type in any text in the search field. Lightroom will then search through various fields, including image file name, caption, title, and any searchable metadata/EXIF.
For example, if you enter "tree" for the text, Lightroom will search for any image that correlates to that word. It will show you those images it finds containing "tree" in their file names, as a keyword, or in its metadata and EXIF data. If you were to input a number as text to search, it would call up everything where that number appears, including any metadata like your camera's serial number.
TIP: To be efficient when searching, be specific when entering text, so you don't receive too many responses. You could also add a sub-filter, like "Starts with" or combine the filter with the "Attribute" or "Metadata" tabs.

Filter Based on Attribute
You can find images that already have specific filters attached to them using the Attribute tab (including star rating, flags, edits, and color labels). You can also filter your catalog's content based on file type (including master photos, virtual copies, and video files). You can combine any type and number of filters with helping you find the images you want - sort of like a process of elimination.
TIP: Combine Attribute filters with a Text or Metadata search for better results. For example, select a specific Color Label from the Attributes section. It will search for all the images in that location with the color you chose assigned to them. If you also add a camera brand, let's say Canon, in the text search field, it will further narrow down the search to those with the Color Label you selected taken with a Canon camera.

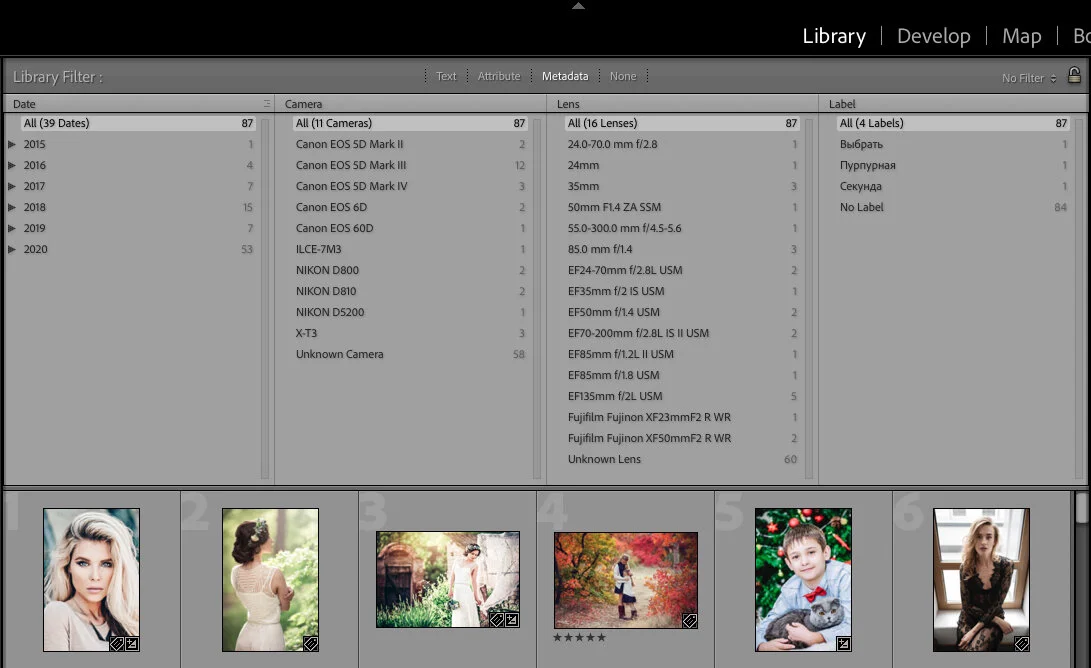
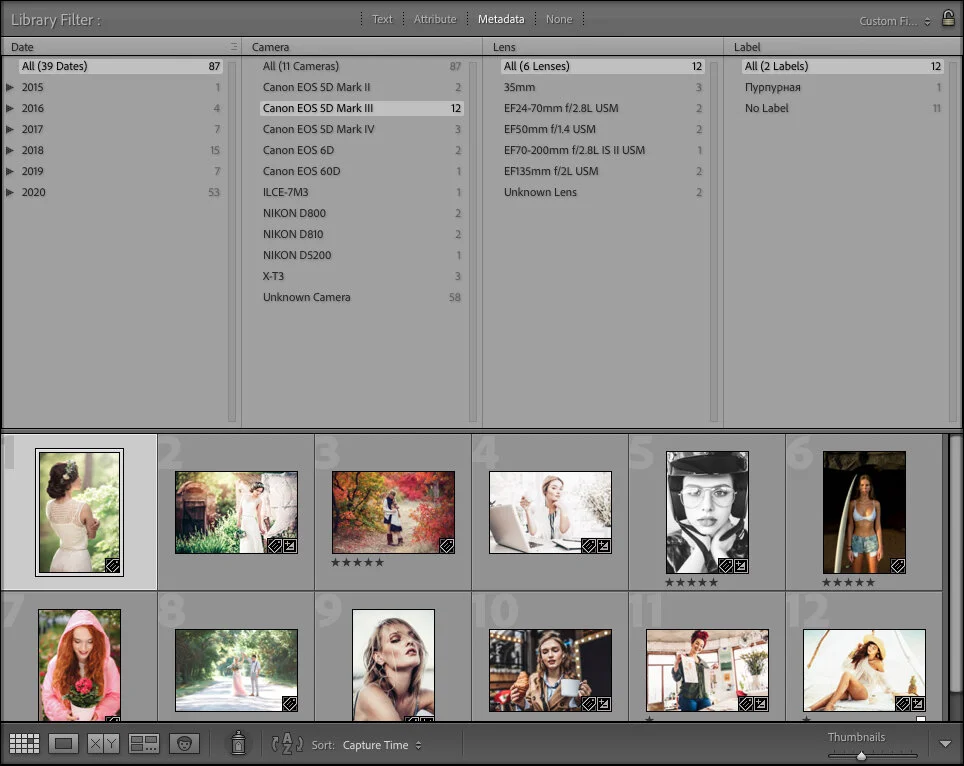
Filter based on metadata
Metadata is the third filter. It's probably the best one at filtering searches, making it very useful when you're organizing or cataloging images. It's so efficient because it can easily select between various fields, like file type, date, exposure, or flag, with the capacity to apply different levels of filtering. For example, you can search for images shot on a particular camera with a specific lens and aperture. You can even add in a date. That's pretty handy when conducting searches.
To use: Here's an example of how to use it based on date, camera, lens, and aperture:
Select "Date" from the drop-down.
Click on the month for the first row.
Select "Camera" and choose the brand for the second row.
For the third row, enable the "Lens" filter and select the lens details.
Select "Aperture" for the last field and click on the appropriate aperture.
Lightroom then brings up all the images that match the parameters you've set.
Organizing Photos
So far, we've demonstrated what the Filter Bar can do for you by searching based on your specifics. However, you can also use the bar for organizing images. However, we suggest you begin by organizing the image folders first. You can do this by category. Let's say you're an event or wedding photographer. You'd organize the folders by event type or wedding names.
To organize:
Filter images by specific dates to identify related photos.
You can then select the relevant images to move into a new folder.
Once your files are sorted into a folder, you can use the Filter Bar to apply additional criteria, such as edited or not edited. (Obviously, you can create and apply whatever criteria you like.)


