
Learn How to Create Amazing Black and White Photos in Lightroom
In our days, many people appreciate the visual appearance and stylishness of black and white photo, that vary hugely from a color one. Black and white photo it's not just the result of the old technology of a bygone era, not at all, it's safe to say that it's relevant up to now. This method is used by photographers nowadays to extend the color range of their possibilities and is used in such styles as glamor, fashion, portrait, etc.colours, as exactly the black-and-white photo made by yourself can capture the atmosphere of the shot, not diverting your attention by the vividness of these colours. With the help of the black-and-white photo, we can see the world beyond the wocolors. It allows us to control the mood of the shot. With its help, we can emphasize details that we usually can't notice on color images. Finally, black and -white photo is a technique, which can increase our skill to tell stories by the means of forms.

Step One
Press a hotkey D, to switch to the Develop module and on the right panel field scroll down to the panel (HSL/Colour/B&W), then click button-inscription B&W on the right end of the panel title (as shown here). This will automatically convert an image into black-and-white, but unfortunately, it's usually a black-and -white image with small depth. The main point here is to adjust an automatic black-and-white conversion by moving colour sliders. The trick is that the photograph is not chromatic anymore. Continue further and move sliders, all as you want to see how they act.

Step Two
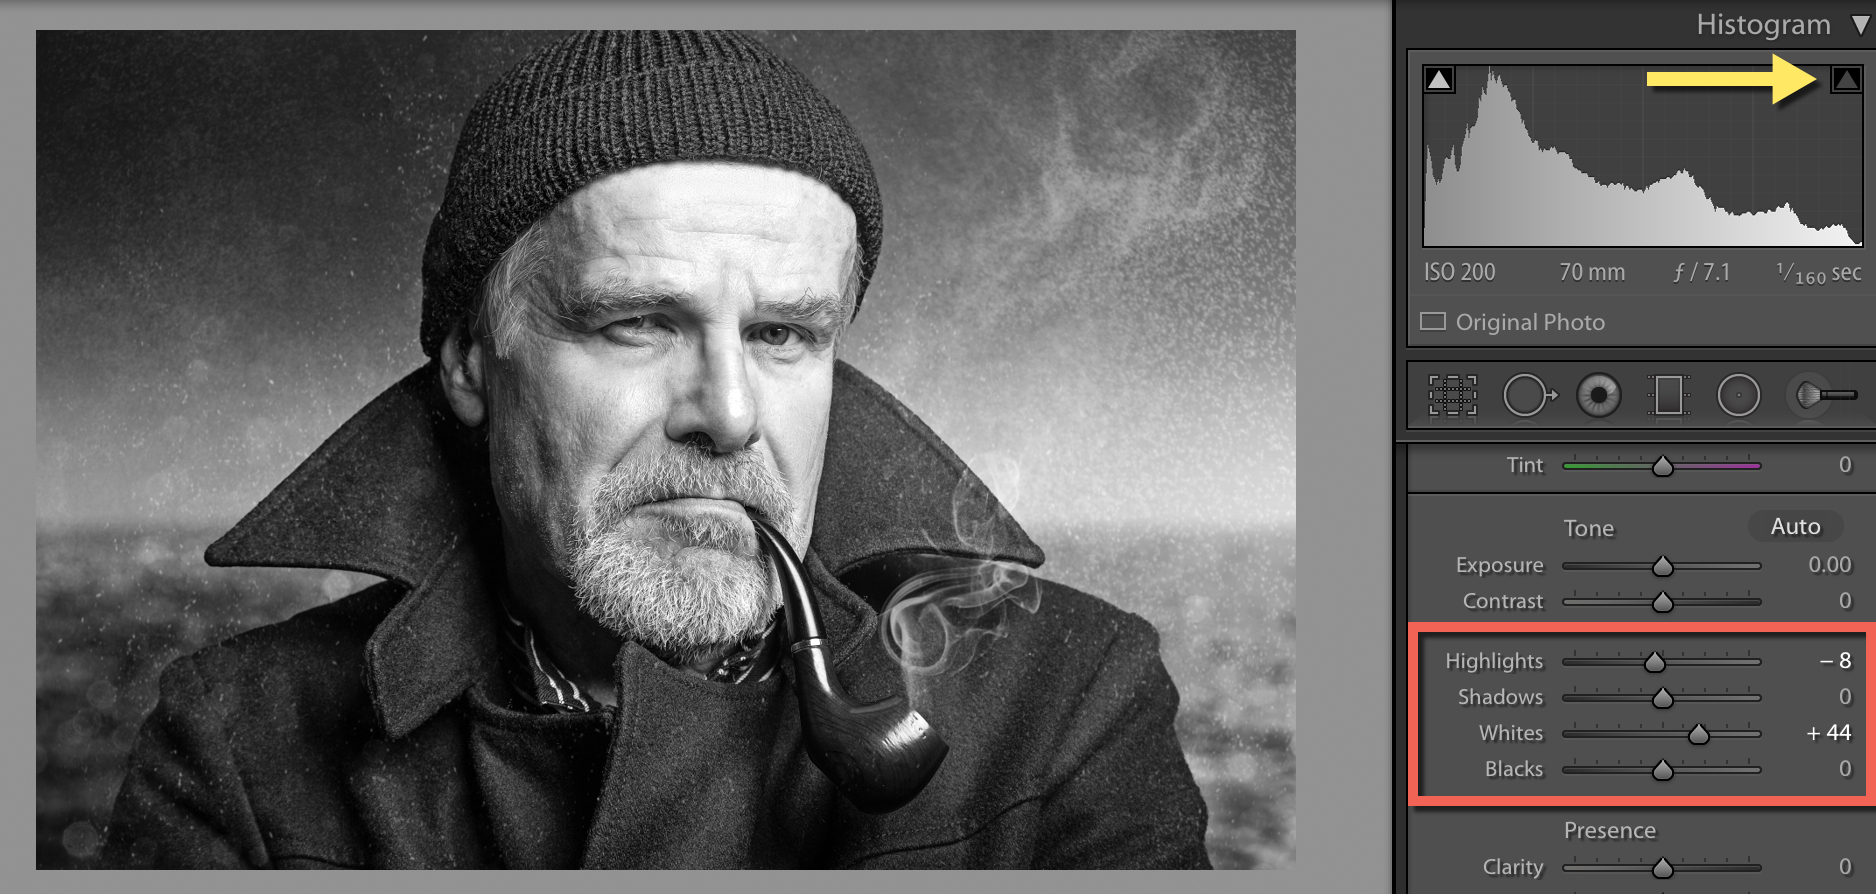
The majority of the photographers seek to create very high-contrast black-and-white images, so the first we should do is make sure that we have removed all hotspots on the shot. To make so move a slider Whites to the right until a white triangle appears (at the top right angle of a histogram), and stop at this point. Then move a slider Highlights a little bit to the left, until a white triangle becomes dark-gray again. Now you know, that you got the maximum amount of colours, without cutting any of them.
Step Three
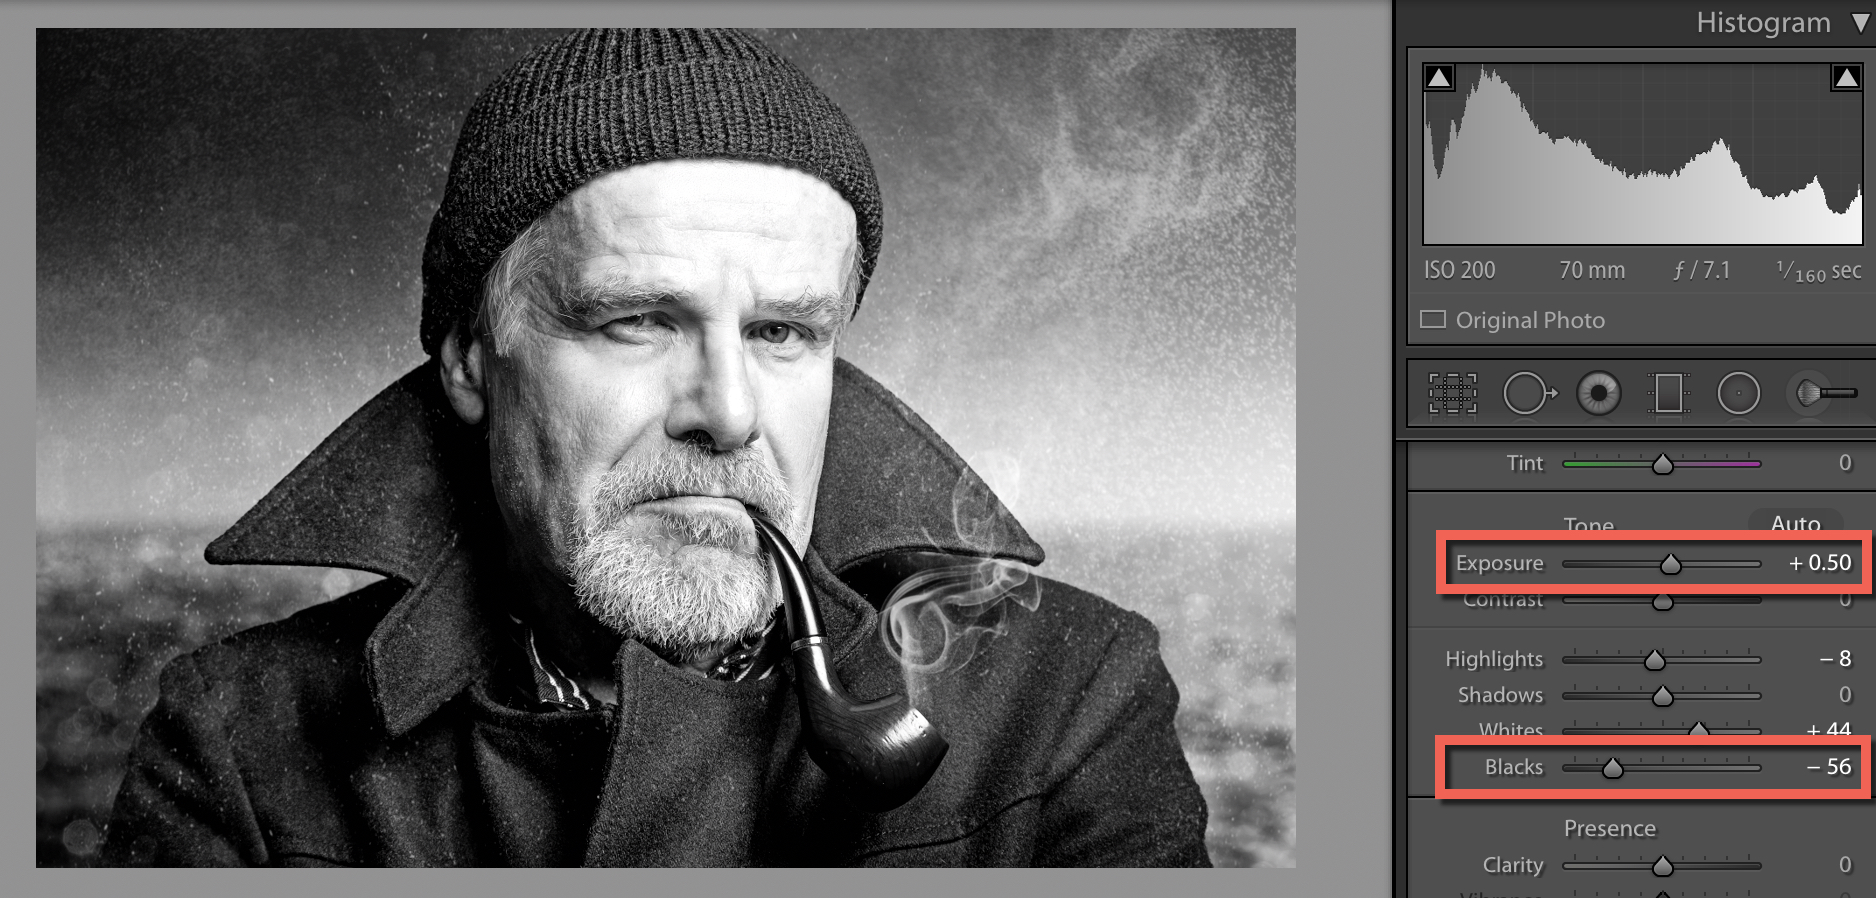
Then move a slider Blacks to the left until a shot will get volume and lose flatness (as shown here). Some photographers believe that you should never allow any part of the shoot become entirely black, even if it's an unessential part without details, such as a shade under a stone. I don't belong to them. I aim to make a shot look somewhat in “pop-art” style, and due to many years of experience, I came to the conclusion that an average person reacts much more positively to the shots with high-contrast transformation, then with less vibrant transformation, which contains 100% detalization in shades. If you have such an opportunity try the both variants, show them to friends and see, which they prefer. Surely, after darkening shadows, the shot looks more dark in a whole, and probably you will have to increase Exposure volume, to highlight a little bit the middle tones.
Step Four
Our aim is a high-contrast white-and-black image, and we can move a slider Clarity substantively to the right (here I moved it to +5O), what significantly increases the contrast in middle tones, and also adds vividness and freshness to the image.

Step Five
So, we have finished our transformation. However, there is one more thing that you should know, namely, how to edit a separate area of the black-and-white shot. For example, you would like a sweater here to be a little bit lighter. You should go to the panel B&W again, click TAT (Targeted Adjustment tool), marked here with a red circle, then click the area of the sweater, which you want to make lighter and drag TAT directly upward. Even though the shot is black-and-white now TAT knows, what primary colours compose this area, moves sliders to increase the brightness of this area (click on the right button of the mouse and move to increase the brightness). Next time you want to enhance the brightness of the particular area (or on the contrary, make it darker, moving TAT downwards), try to use TAT and allow it to fulfill the job for you.

A TIP: How to find out, which shots can be successfully converted into black-and-white
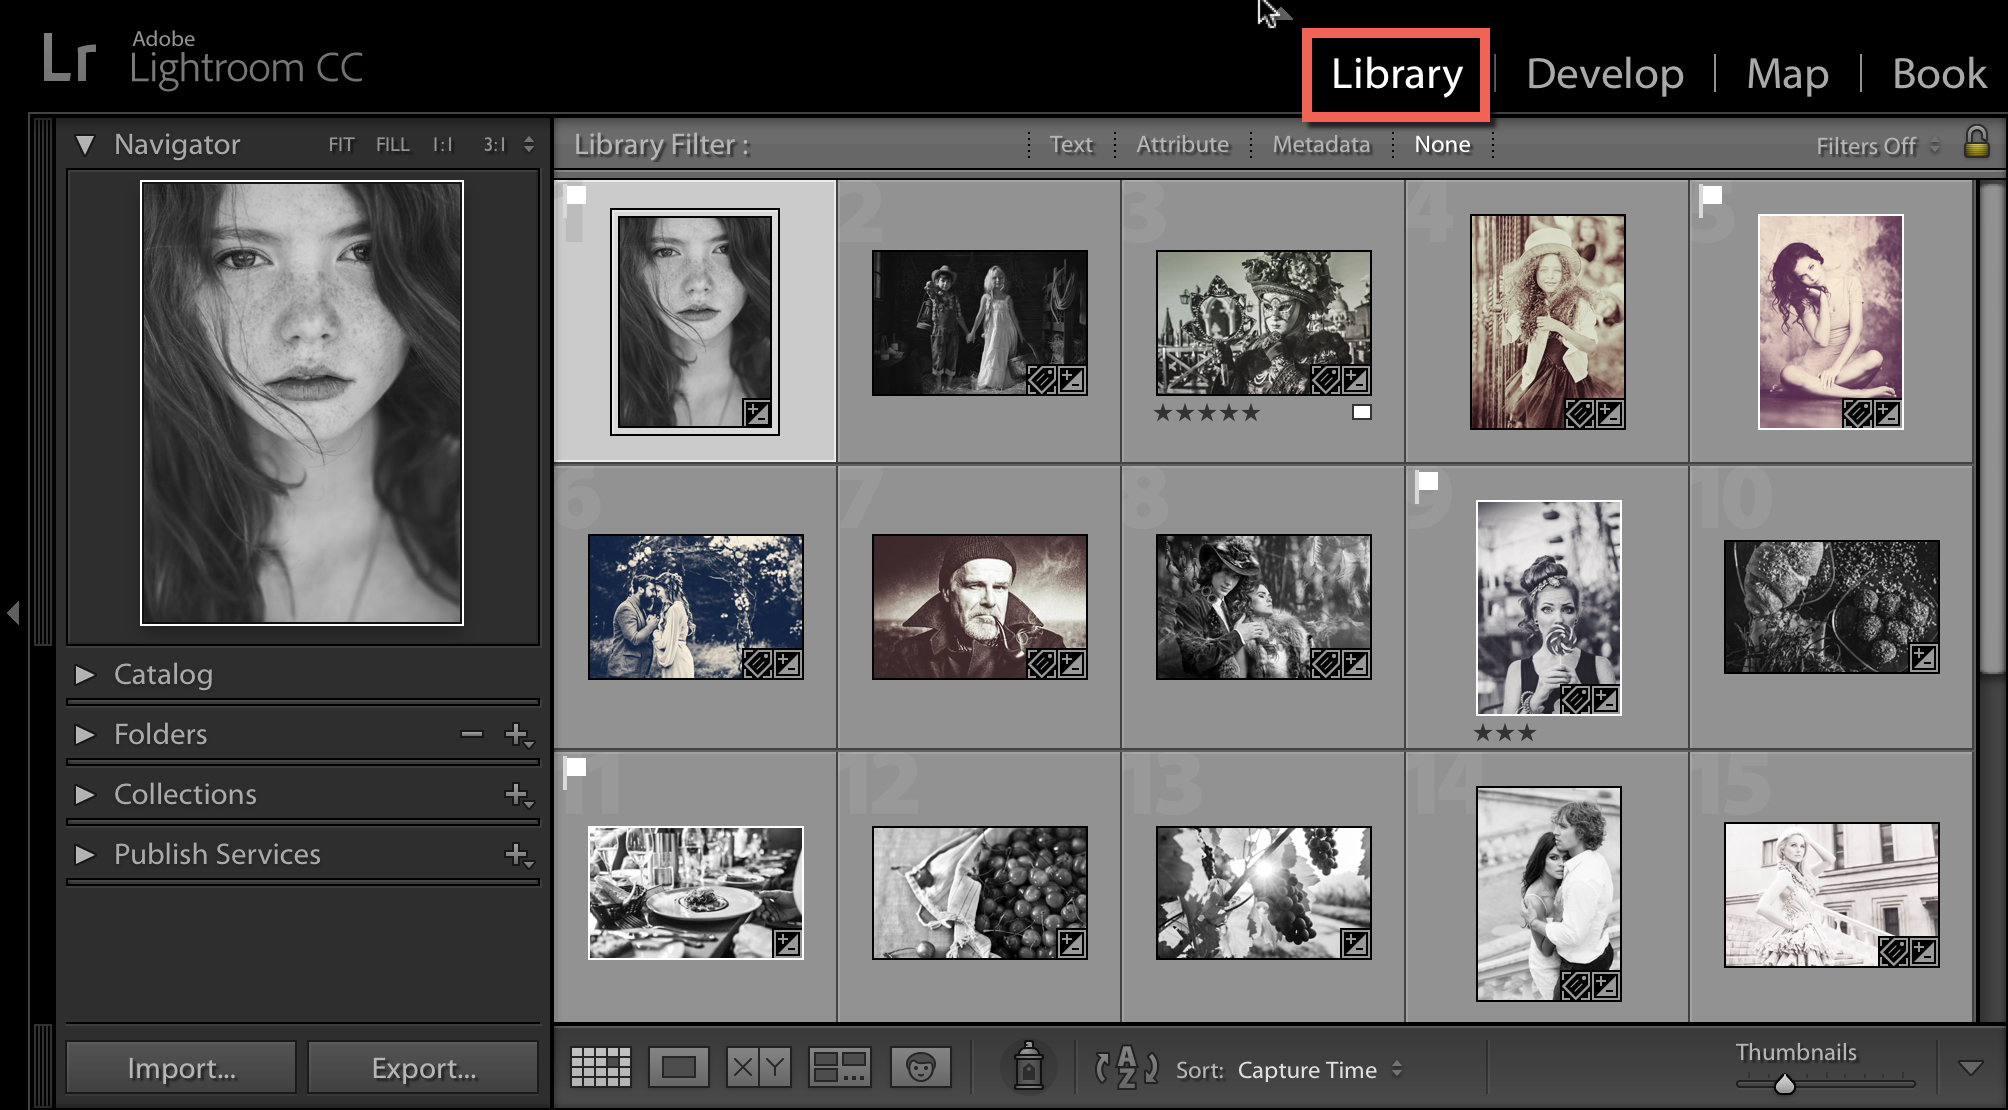
Go to collections, click Ctrl + A (Mac: Command + A) to select all the images, then click V button, to temporally convert all images into black-and-white. Now you can see which of them (or none) would look great in black-and-white. Press Ctrl + D (Mac: Command + D), to cancel the selection of all images. When you see that a photo will look awesome in black-and-white, click it, then press <P> button to set a mark Pick. When finished, select all images again and press B, to return the full-colour view. Now all the pictures, which you considered appropriate to be converted into black-and-white are marked with Pick sign. This is rather convenient.
One More Tip: Use Lightroom Presets and Photoshop Actions
To create an excellent black and white picture, you do not necessarily need to spend hours and hour on post-processing. Just take your picture as usual and then use our Black and White Lightroom presets and Photoshop actions collection. It’s an easy way to convert your shots to stunning black and white images in just one click. See the examples below.

If you like this article, then please consider following us on Pinterest and Liking our Facebook Page. Thank You!


