
A Street Photographer's LIGHTROOM Tutorial for Improving Work Flow
Extraordinary images consist of details. They combine to tell a story and capture the viewer. Capturing details can sometimes be a challenge for the street photographer as they scramble to shoot a picture.

The rush to shoot can mean less than perfect images. That's where post-processing edits can help. We've put together a brief Lightroom tutorial with edits that can help you streamline your workflow. These should be helpful regardless of your photography genre.
We begin in the Library Module, followed by the Develop Module.
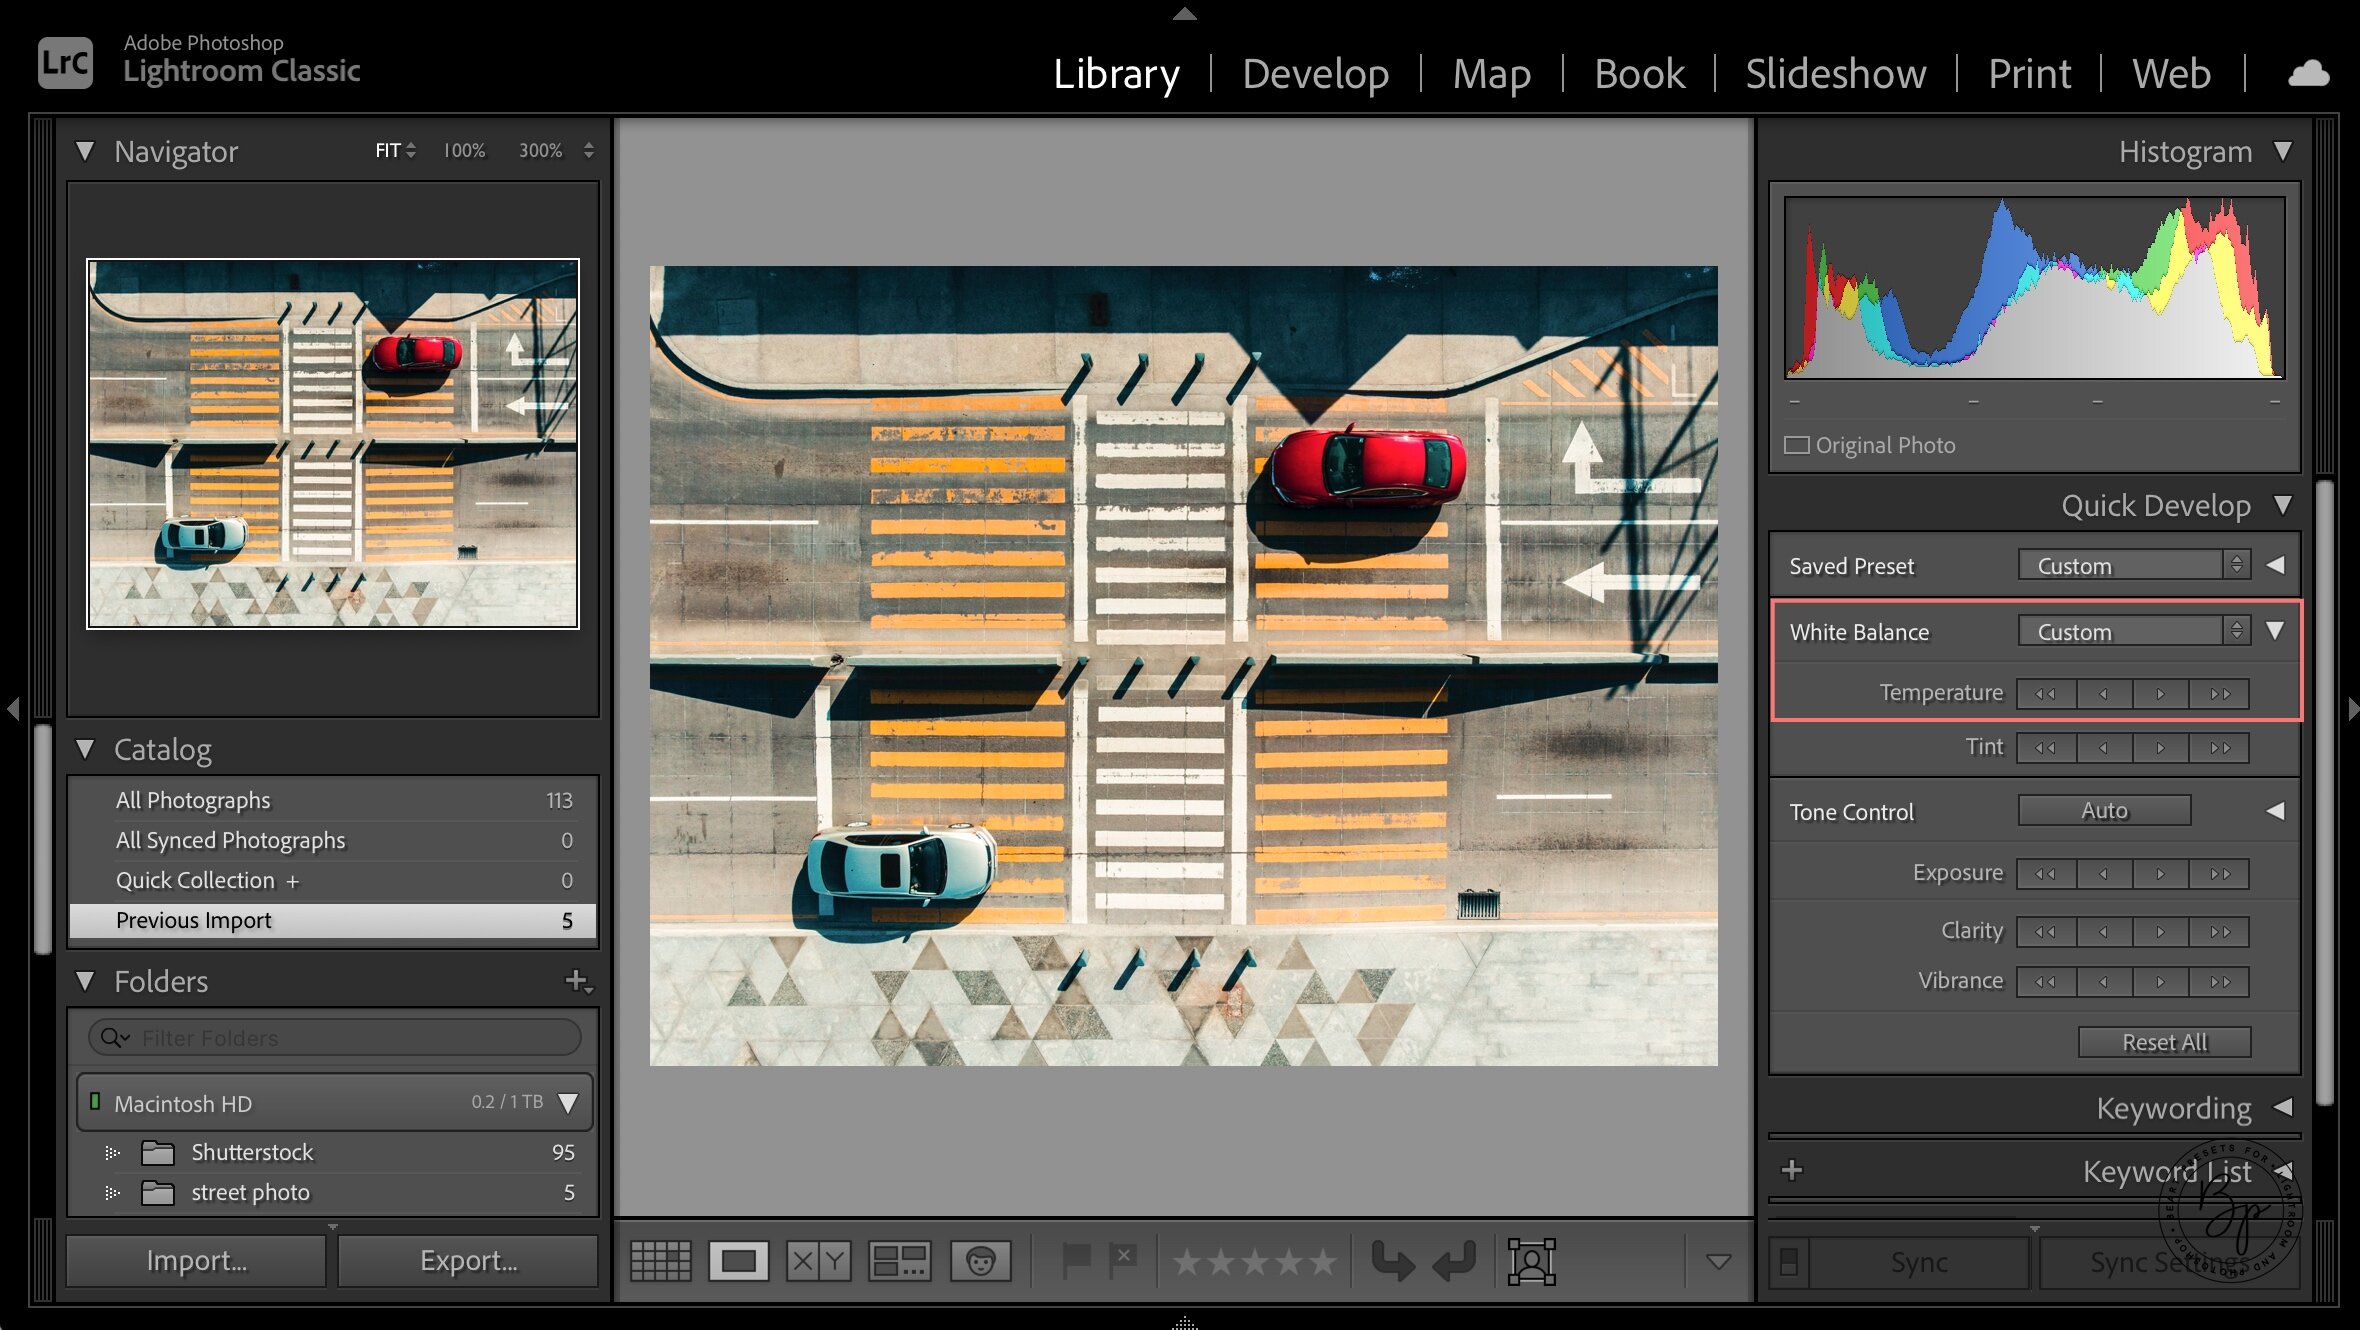
Library Module
Select images: Select a batch of images with similar lighting conditions. Ideally, they should have a similar theme as well. While images can have varying lighting conditions, note that the greater the differences, the more likely you'll have inconsistent results. The Library Module applies edits to this selected batch of images.

White Balance: In the Quick Develop Panel (found at the top of the right panel in the Library Module), select White Balance, then Auto. The software assesses the image and automatically makes the necessary adjustments.

Adjusting warmth: To adjust the temperature, slide the single arrow under the temperature heading. (If you hover over it, a "Make Warmer" hint pops up.) To increase the warmth by +5, use the single arrow. For twice as much (+10), use twice. And to increase by increments of +15, use the double arrow.
Shadows: This is easy to adjust using the double arrow on the right. To decrease shadows, click it once.

Auto Tone: Auto Tone automatically adjusts highlights, shadows, exposure, whites, and blacks of each image individually.

Decrease Highlights: To decrease highlights, use the double arrow on the left, clicking it once. To monitor the process, which can take a few seconds, watch the progress bar at the top left side of the screen above the Navigator window.

Decrease exposure: If you want to decrease the exposure, use the single arrow to the left. It will reduce exposure by ⅓ of a stop while making darker tones a bit darker.

Whites and Blacks: Click on the single right arrow once to increase white clipping. To decrease the black clipping -5, click the single left arrow once.

Clarity: Clarity increases the contrast where two tonal values meet. It's similar to contrast, but not as dramatic. To adjust it, press the double arrow to the right one time to increase the clarity by +20.

Vibrance: Vibrance deepens color tones that aren't already saturated. To increase vibrance, press the double arrow to the right. Sometimes you will also want to adjust down the saturation if you're increasing vibrance.

Up to this point, you made edits to the batch of images you selected at the outset in the Library Module. (The sliders reflect those changes.) Now, we move into Develop Module.
Develop Module
Lens Corrections: Start by scrolling down to the Lens Corrections panel to make edits based on the lens you used. To do this, select Enable Profile Corrections and Remove Chromatic Aberrations.

Detail Panel: Scroll back up to sharpening. Increase it to +50 and masking to +25. Now we can rely on the software's auto features to do their thing. Read on!

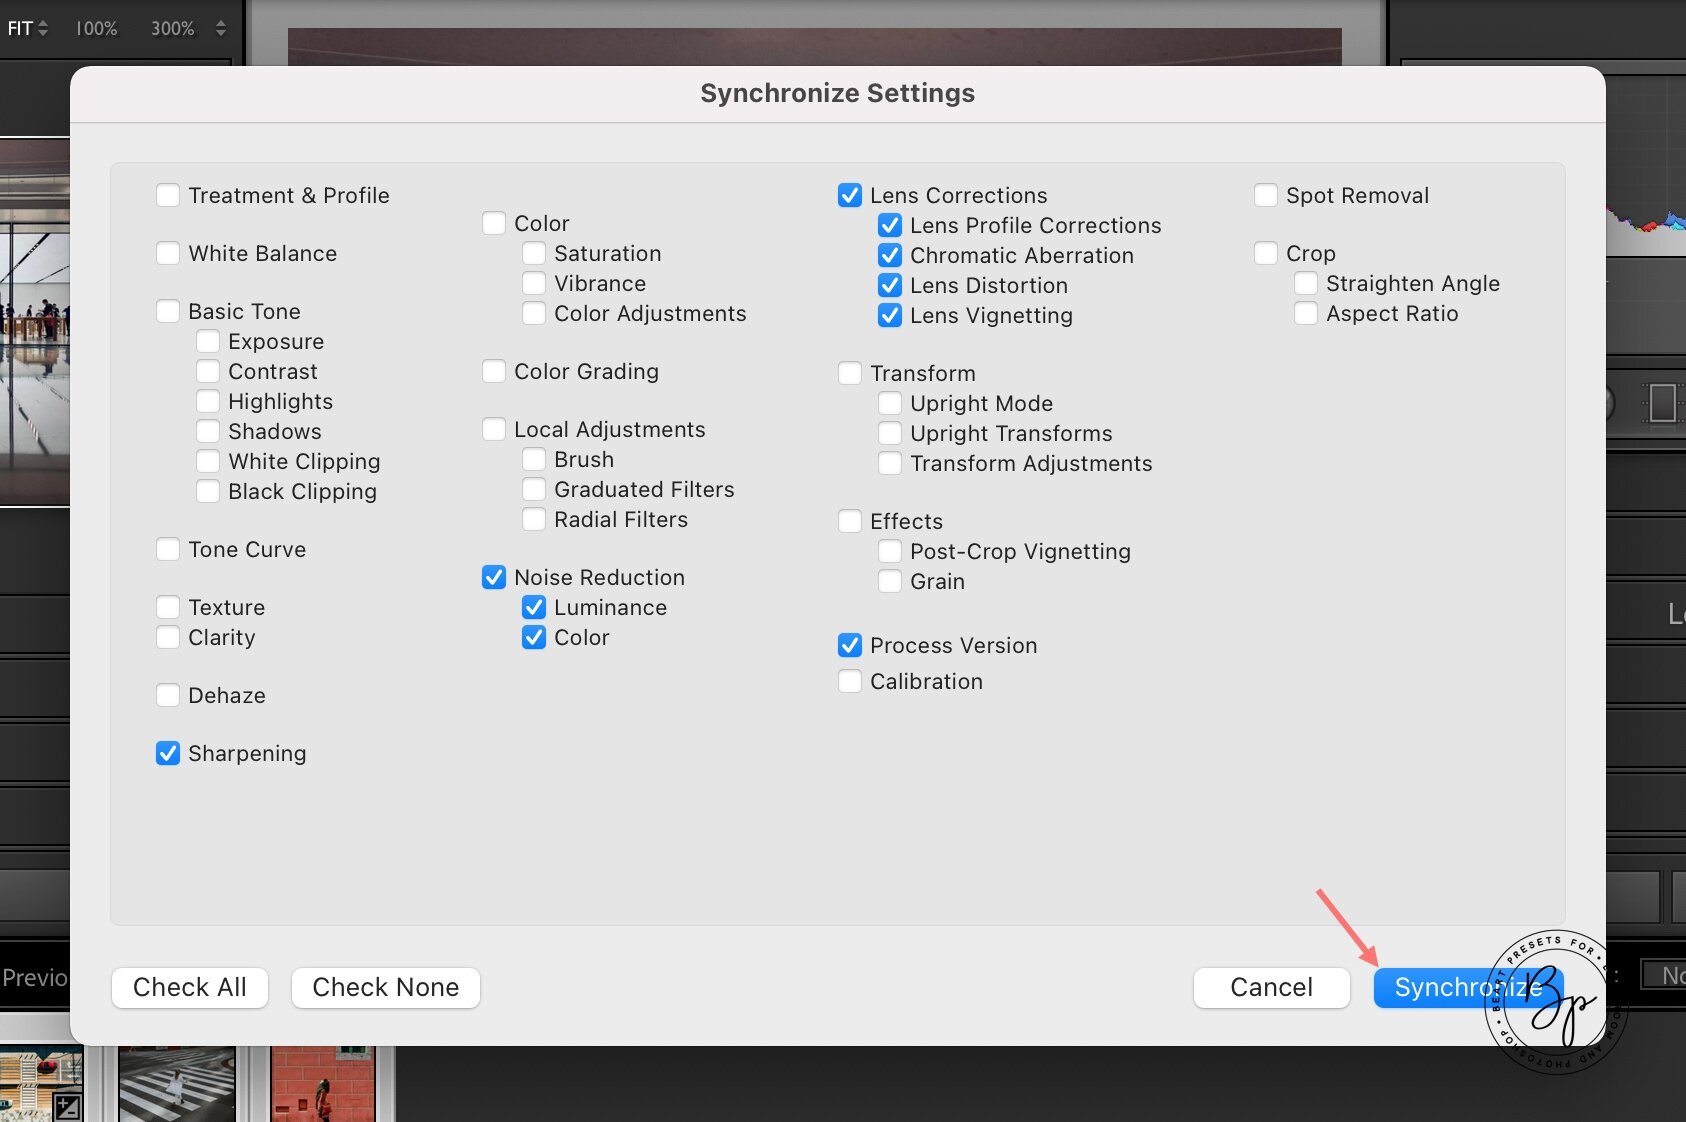
Sync settings: Make sure that all your images are still selected before you do this next step. Then look for a rectangular button that says Sync located at the bottom of the Develop module. Click on it. The Synchronize Setting window will pop up. Select Check None to ensure that your previous adjustments aren't changed.

Next, you'll want to select the boxes: Sharpening, Noise Reduction, Lens Profile Corrections, Chromatic Aberration, and Process Version. Click on the "Synchronize" button. (Your Library Module edits should remain the same.) If you'd like to make some other manual enhancements, you can.
Hopefully, you'll find these tips useful as a basic starting point for your street photography enhancements. Lightroom allows you to rely on its auto features and still able to make additional edits if needed.


