The Ultimate Guide To Food Photography
If you want to take great food photos, you should have some special knowledge about what looks good and what looks terrible. We prepared several recommendations, which you should keep in mind, while photographing dishes, if you want to get the results similar to what you see in magazines and books. Hope, this will help a lot of photographers and ready-to-eat food shooting lovers to get amazing and tempting photos. The food in our case plays the role of a photo-model, so food shooting will require a lot of attention, photographer’s professionalism and also food stylist's delicate work.

Consider the colors of your dish
Light plays a great role while taking food photos. In the most cases you may add herbs that will contrast the main dish, this will effectively add color accents to your photos. The knowledge of a color wheel, which colors contrast and which complement each other, may be of great use when taking food photos. The overall look doesn't only depend on the food that lies on the plate, but also on the things that frame it. Organizing the table and some elements in proper way may significantly help (or distract) you create an awesome composition and get great dish photos.
Consider the colors outside your plate
Very important to consider the color of tableware, cutlery, table, cloth, etc. that surround the main object, as they have a significant impact on the final result. Colors are usually chosen on purpose, either to contrast or to complement each other. Both variants can be used successfully. On the other hand, some colors don't work with food (for example, it's rather difficult to use light green if you want to make the food look delicious).
What should a photographer know about light when shooting food
Perhaps one of the most important aspects, affecting the final outcome of the food shooting, is the quality of lighting. The good news is that a rather small size of the photo object gives you a great advantage when it goes to light manipulations.
Natural light from the window plays a key role in the professional food shooting. (if you can get natural light from the window on a cloudy day – you are even more fortunate). Soft, diffusive light, that creates beautiful soft shadows, is perfect for the most food photos. Generally the best image is achieved when the light falls from the front (mainly along of the photographer's shoulder), at the same time all the light angles could be used during the shooting process:
Depending on light conditions you may require a tripod. Try to avoid shades, especially in the foreground, and direct sunlight. Pay attention to hot-spots, some objects have a matte surface, others are glossy – some absorb light, others – reflect. When required, you can combine natural light with flash or a continuous light source, here you should be attentive and use it wisely. Such things as breakfasts, tea, coffee and confection look especially cool during the day light.
Reflectors – if you want to achieve more diffused light or soften some shadows, then it's better to use a reflector. You can achieve the desired result with the help of a specially manufactured reflector or you can experiment with light materials (white paper, textiles) or reflecting materials (foil).
Studio Lighting will help when you can't use the advantages of natural light. The usage of studio lighting when shooting food is a big deal, however, usually you should soften and diffuse light with the help of appropriate materials, as much as possible.
Low key food photography – this trend became more and more popular and offers to use dark surroundings to create a chiaroscuro effect. This is related to the usage of darker colors in dishes, background, surroundings together with natural light from the window as in the example below. As a result, you get a very dramatic and striking image.

Choosing lenses
No matter what do you photograph – several dishes in one shoot or only some elements of food/dish, in any case it's better to use a fast lens. When taking long shots – use moderate wide-angle lenses. If you want to use a full-frame camera, than a 50mm lens will be enough.
If you are planning to take the detailed photos of dish elements or separate the components of food, spices, berries, confectionery – you need a close-up lens. For example 60mm or 105mm, some photographers use tilt-shift lenses. In general this should be enough, although, of course, it's not a complete set, which can be used for various subject shooting.
In order not to spend hours on post-processing, refining and improving the image to create an ideal picture, don't hurry up and be very attentive during the shooting process. Use a tripod when taking macro shots, and watch all the required subjects be placed within the depth of field area. If you use a PC or a laptop, it's better to send the images right there immediately. The screen even of the cheapest PC will help you to evaluate the image quality better than a camera screen.
Useful tips that will help you advance the quality of your photos
The following tips will be useful, if you are really inspired and want to create fast and at the same time beautiful food photos. They are not fundamental truth and in many cases can be ignored. However, when you are out of time, the following tips will help you to get better shots:
Set up your place of shooting so, that you will be able to use the advantages of natural light from the window. It's better to photograph in the daylight next to the window with a white curtain to diffuse the light, as the flash will make the subjects too flat.
To limit the depth of field use large aperture (f/1.8 – f/5.6) and focus near the front edge of the food.
You can use zoom leaving only your dish in a shot, or you should set up a background to create a context.
Find some garnishes or decorations that will contrast your dish and place them on it. Bright colors, such as green (onion), red (paprika) and white (Parmesan), usually work well.
Let the portions be small, that will allow to distinguish the center of your image.
If you wash fruits and vegetables before the shooting they will have a glossy surface, and water drops will give your photos an admirable glare.
You can also drizzle with oil meat, fish and vegetables, thus they look more juicy and colorful.
The rules of food shooting also have some exceptions: never take photos of over roasted food, turbid soup in a saucepan, faded greens and some other products, the attractiveness of which is rather doubtful.
Using cropping and zooming (increasing the image size) you can emphasize the most delicious part of the dish – you can't deny that a tempting piece of food, taken from the whole composition, looks very attractive.
How to make dishes look as natural as possible while shooting? Take a lot of photos from various angles – the more photos you will take, the easier it will be to choose the best one. And don't waste your time, work as fast as possible, until the dish looks fresh.
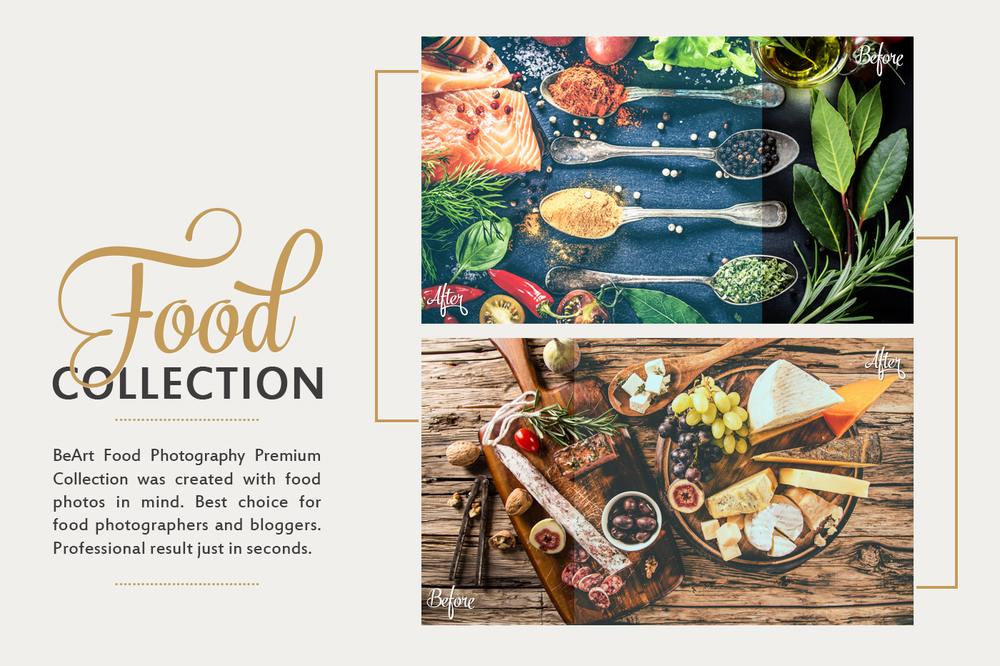
Use Lightroom presets, Photoshop actions or Camera RAW presets, which specially designed for the food photography. These presets will add brightness, color, matte, vintage and HDR effects. Photoshop actions and Lightroom presets will help to add a professional touch to your photos without complicated editing.
Reading books will help you develop your own style of photography & create images that will express the beauty of the food you wanted to photograph. These books will guide you at all levels to make your food look as good as it tastes, and to do so as naturally, and simply as possible.

Food styling tricks
As the photographs have some gimmicks, so food stylists also have tricks, that allow them fast and easy make the food look tempting and attractive before the shooting. Remember several of them:
All the greens and herbs (for example, lettuce) will look more colorful and fresh, if you place them into ice water for several minutes before the shooting. Don't forget to shake water off before photography.
Apply with a brush a little bit oil on the hot food to make it look fresher on the photos, especially if it was staying for some time.
Don't add to much dressing to salad – this will make it look soggy.
The fresher – the better. It's good both for taste and for look.
Under-cook your food – so it looks fresher and larger on photos.
Make sure, that plates and cutlery are really clean. Blots from food on a tablecloth or on any other surface can also spoil your photos.
How to judge the quality of your food photo? Very easy! The food photo should make you hungry. When looking at the final result – you should say, I really want to eat this. It's impossible to transfer the smell and taste of food and photographer's work involves making photos look really tempting with the help of lighting, lenses and appropriate angle. If you remember all these aspects, I think, you will get an amazing food photo.

If you like this article, then please consider following us on Pinterest and Liking our Facebook Page. Thank You!