Using the Spot Removal Tool in Lightroom
Lightroom is a high-regarded software program for many professional and serious hobby photographers. It’s a user-friendly program for editing photos. It’s not too difficult to get started even for the novice photo editor. Below we offer some easy to follow tips for using one of its most important features Spot Removal tool - an indispensable tool you’ll come to rely on heavily.
What is the Spot Removal Feature?
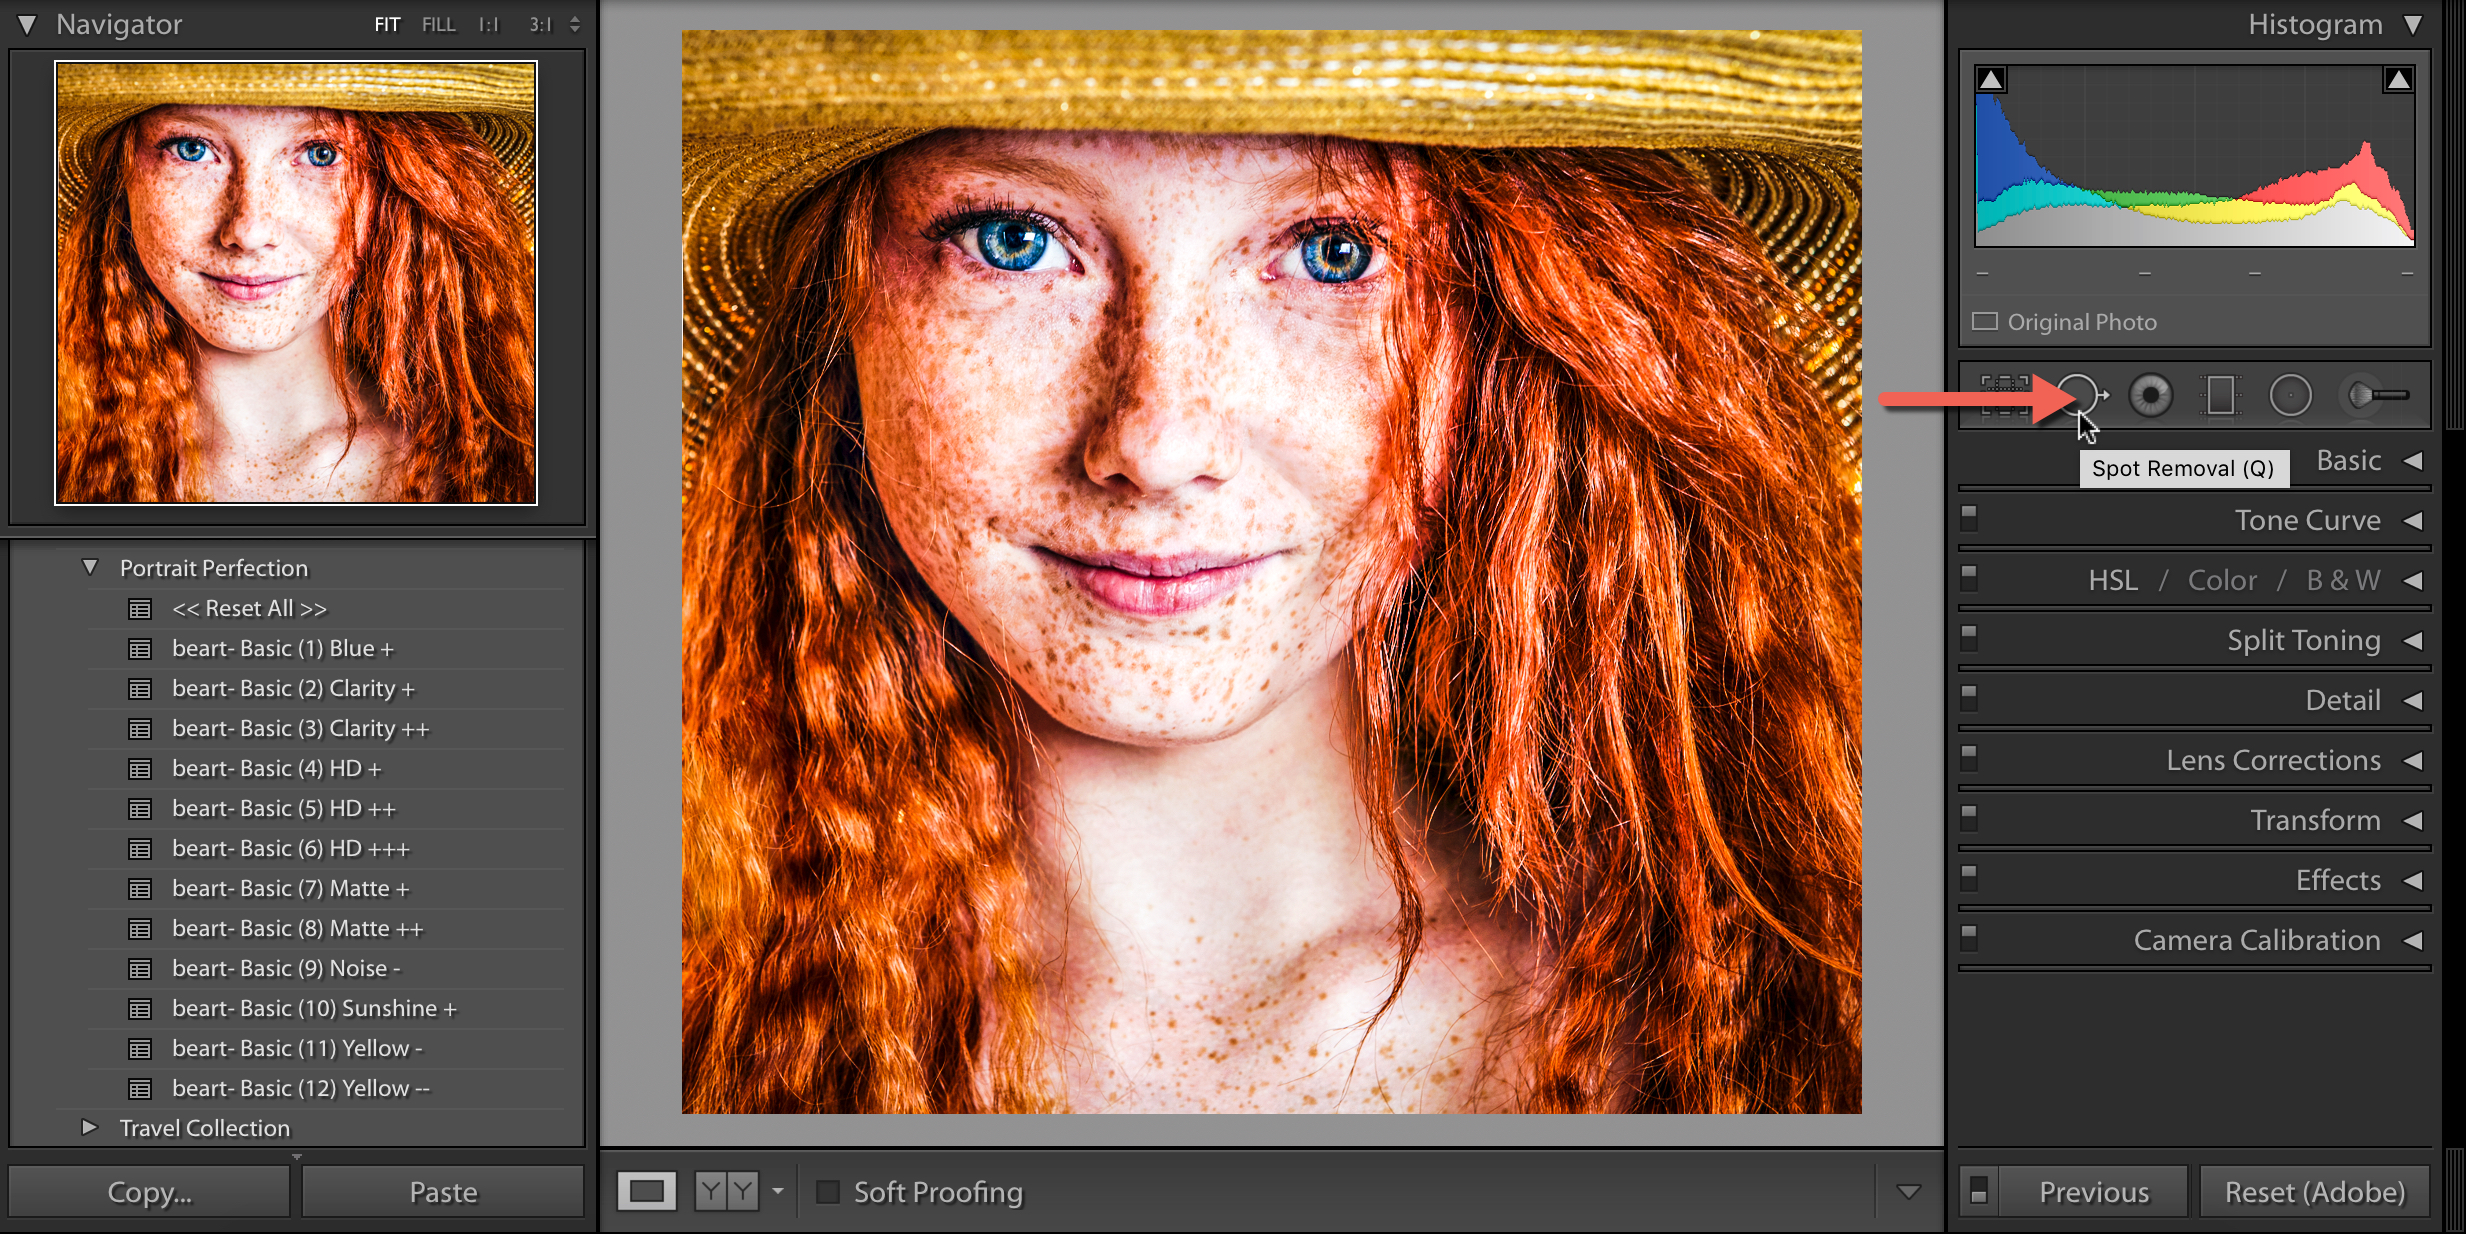
The Spot Removal tool allows you to repair or edit a particular portion or area of an image by using a sample area from another part of the picture. It’s a simple, but the powerful function of Lightroom that allows you to fix minor flaws in a photo such as skin blemishes, spots including dust spots, and even remove or delete objects from the picture. Lightroom doesn’t offer a confusing array of tools, unlike other photo editing software programs. Lightroom's simplicity allows its users to save time by finding and putting to use editing tools so much more efficiently. The Spot Removal feature you can found under the Histogram tab in the tool strip. You can also use a shortcut by pressing “Q” to open it instantly.
How do you use Spot Removal?
So we’ve established that it’s easy to find, and we’ve mentioned that it’s easy to use. To operate it, click on it and two options will pop up: Heal and Clone. Here is how Adobe*, the maker of Lightroom, defines the two:
- Heal - Will match the lighting, texture, and shading of the area to a selected area.
- Clone - Can take the sampled area and duplicate it to another selected section of the image.
If you choose Heal, Lightroom will make changes to the way the Spot is filled meaning that it will not allow you to clone. Its results are usually less noticeable, but even having said that you might find that the results sometimes do have rugged more defined edges. We recommend playing around with both features to see which you prefer.
If you select Clone, you’ll find the results about as good as using Heal. Try both Clone and Heal on the same spot and you’ll likely be able to select the one you prefer for the effect. The Heal feature lends itself to a more natural change or look. It’s easy enough, though, to go back and forth between both Clone and Heal that it’s worth trying both on the same spot.
Can you alter a size of the tool?
Yes, you can. As we said, it’s a very versatile and user-friend tool! Modify the size or the diameter of the tool by scrolling up or down to increase or decrease its diameter. Click on the circle over the spot and click on delete. It’s as easy as that!
How about changing the opacity?
By using the Opacity Slider, you can alter the opacity. You would do this if you’d like to lighten a spot rather than remove it altogether. The Opacity Slider is a great feature to the Spot Removal because it allows you to leave a spot but make it far less noticeable or its details more diffused rather than deleting or hiding completely. You will have some spots for which this is your best solution. Deleting a spot isn’t always necessary or desirable, after all!
Adobe’s Modifiers & Shortcuts:
Circular spot:
- A click once to create a round spot and it then automatically locates a source.
- Control & Command: + click will create a round spot. Simply drag it to set the source of your spot.
- Command & Control + Option & Alt + click will create a circular spot which you can drag to adjust a diameter of the spot.
To delete spot:
- To remove an adjustment, you can select pin and press delete.
- Pressing Option & Alt then click spot to delete it.
- Pressing Option & Alt, drag mouse to create a marquee. This will instantly remove spots within the marquee.
Conclusion:
Lightroom’s Spot Removal Tool offers photographers a terrific opportunity to manipulate and edit images in a relatively straightforward manner compared to other photo editing programs.
We recommend reading through our tips above and then practicing on the program itself using duplicates of any images with which you’d like to work. Spending a short time practicing is a worthy investment in Lightroom. You will quickly learn how to best manipulate the tool and save you time in the future.
We would absolutely love for you to follow us on FACEBOOK and be a part of our community. Don't forget to Share your photos with us using hashtag #BeArtPresets


